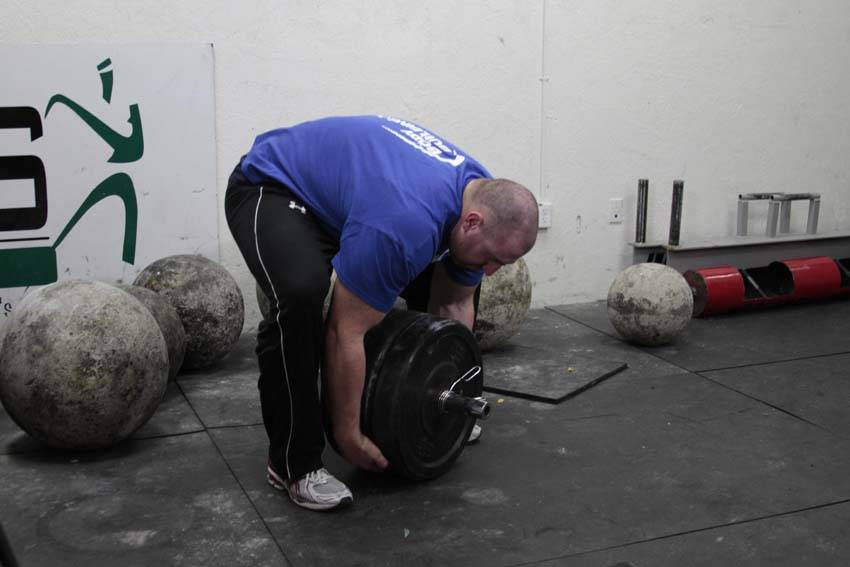
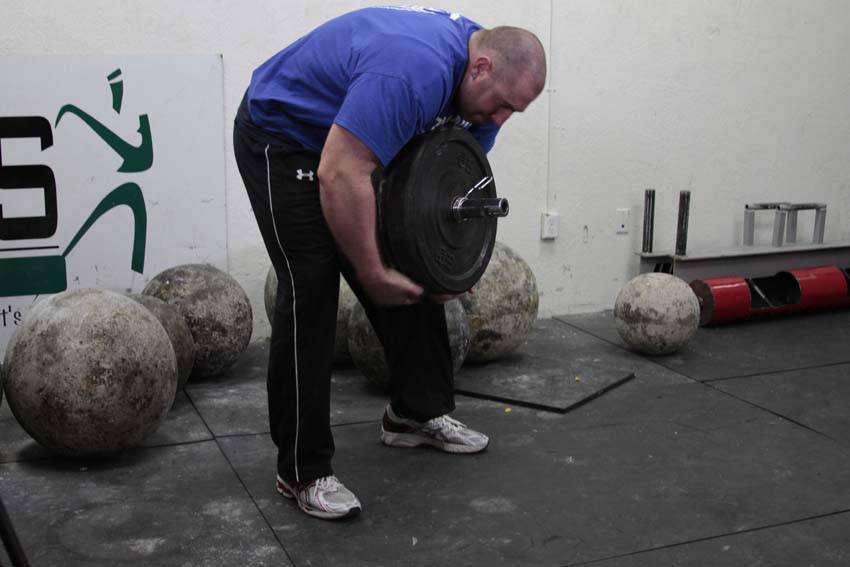
This trainer is effective for developing Atlas Stone strength for those who don't have access to stones, and are typically made from bar ends or heavy pipe.
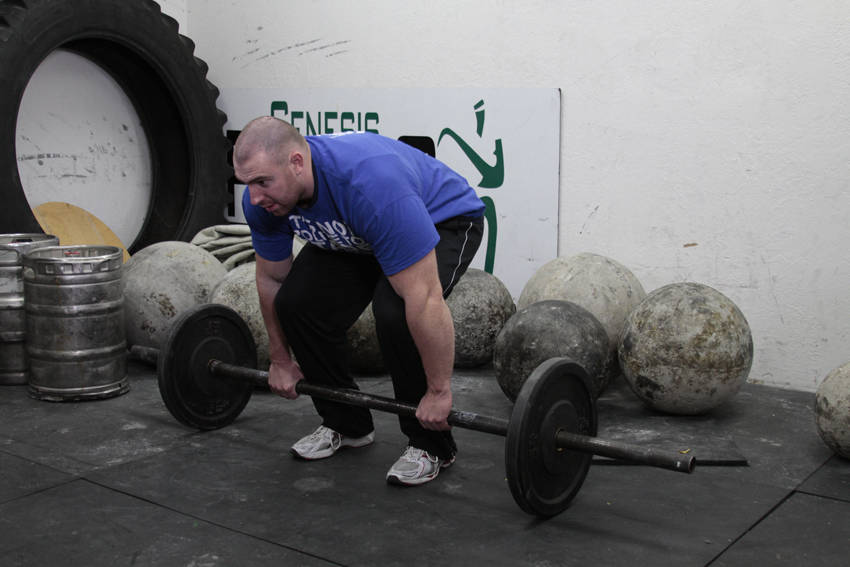
Begin by loading the desired weight onto the bar. Straddle the weight, wrapping your arms around the implement, bending at the hips.
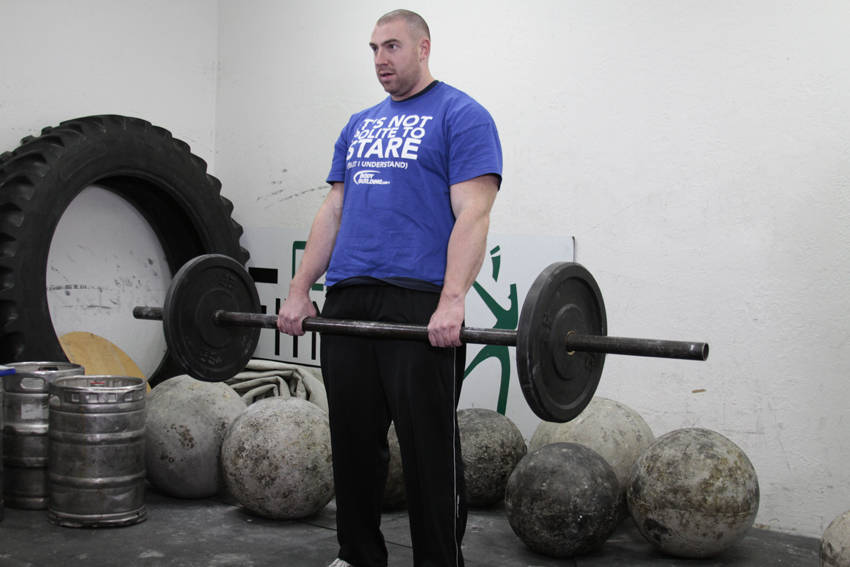
Begin by pulling the weight up past the knees, extending through the hips. As the weight clears the knees, it can be lapped by resting it on your thighs and sitting back, hugging it tightly to your chest.
Finish the movement by extending through your hips and knees to raise the weight as high as possible. The weight can be returned to the lap or to the ground for successive repetitions.
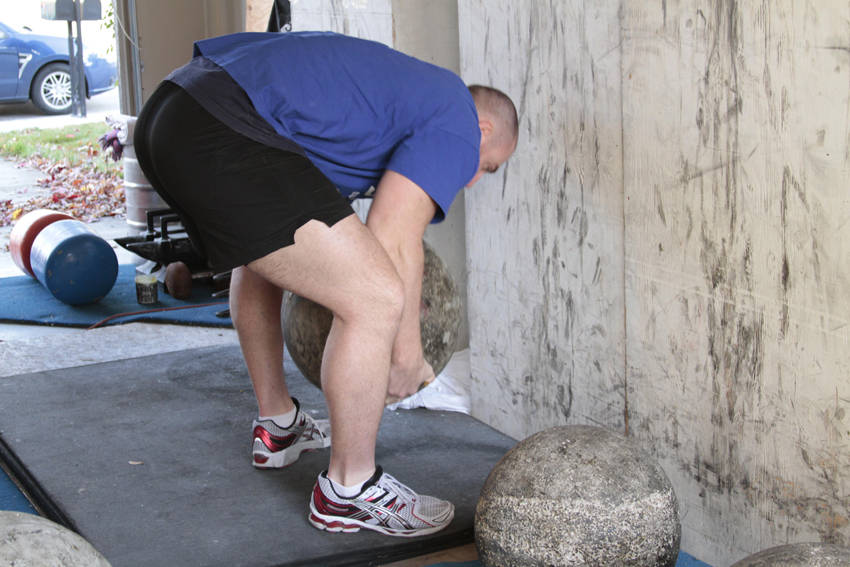
Begin with the atlas stone between your feet. Bend at the hips to wrap your arms vertically around the Atlas Stone, attempting to get your fingers underneath the stone. Many stones will have a small flat portion on the bottom, which will make the stone easier to hold.
Pulling the stone into your torso, drive through the back half of your feet to pull the stone from the ground.
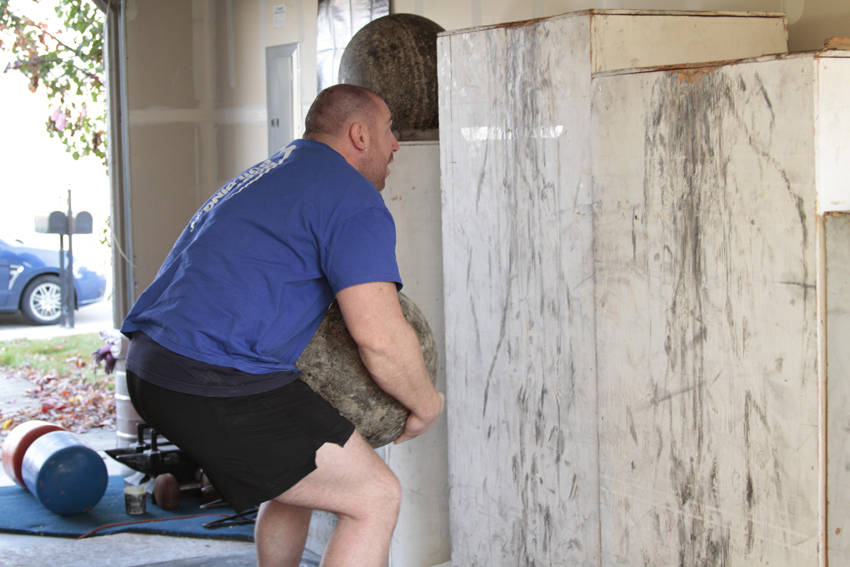
As the stone passes the knees, lap it by sitting backward, pulling the stone on top of your thighs.
Sit low, getting the stone high onto your chest as you change your grip to reach over the stone. Stand, driving through with your hips. Close distance to the loading platform, and lean back, extending the hips to get the stone as high as possible.
Approach the bar so that it is centered over your feet. You feet should be about hip width apart. Bend at the hip to grip the bar at shoulder width, allowing your shoulder blades to protract. Typically, you would use an over/under grip.
With your feet and your grip set, take a big breath and then lower your hips and flex the knees until your shins contact the bar. Look forward with your head, keep your chest up and your back arched, and begin driving through the heels to move the weight upward.
After the bar passes the knees, aggressively pull the bar back, pulling your shoulder blades together as you drive your hips forward into the bar.
Lower the bar by bending at the hips and guiding it to the floor.
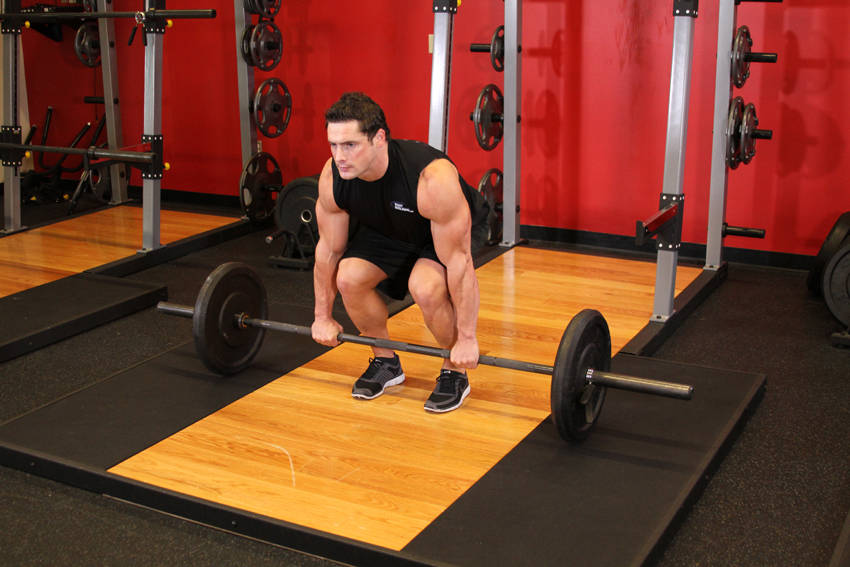
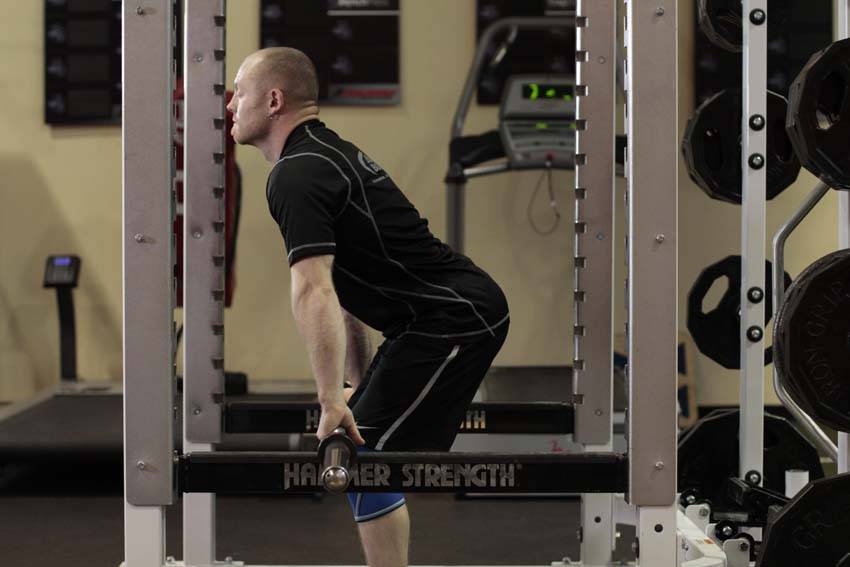
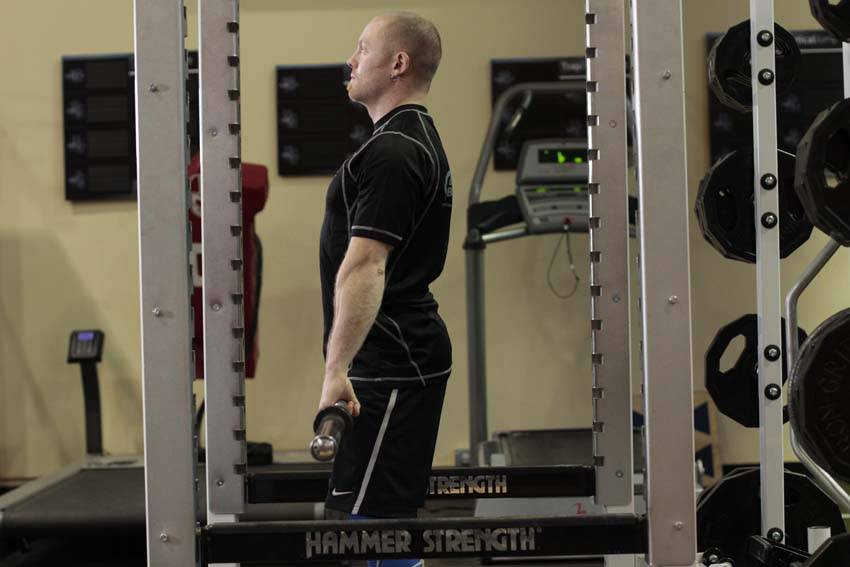
While keeping the back as straight as possible, bend your knees, bend forward and grasp the bar using a medium (shoulder width) overhand grip. This will be the starting position of the exercise. Tip: If it is difficult to hold on to the bar with this grip, alternate your grip or use wrist straps.
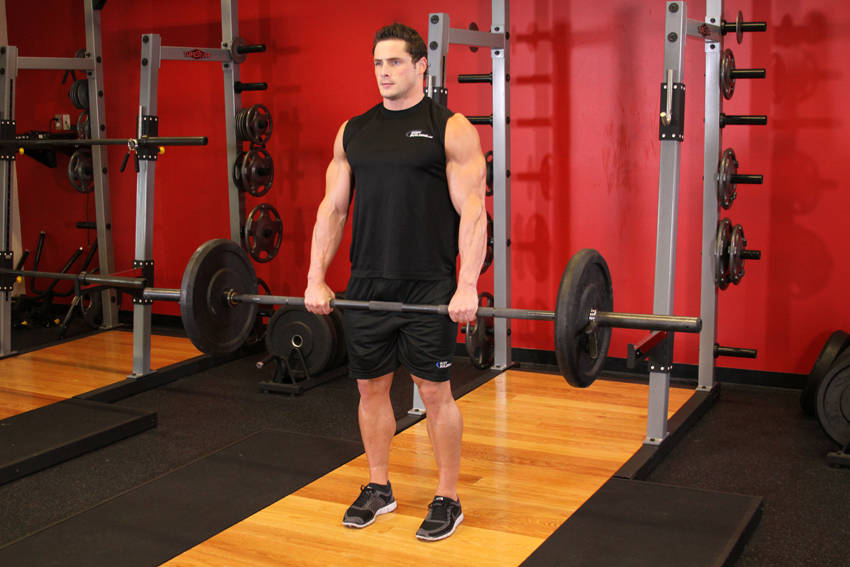
While holding the bar, start the lift by pushing with your legs while simultaneously getting your torso to the upright position as you breathe out. In the upright position, stick your chest out and contract the back by bringing the shoulder blades back. Think of how the soldiers in the military look when they are in standing in attention.
Go back to the starting position by bending at the knees while simultaneously leaning the torso forward at the waist while keeping the back straight. When the weights on the bar touch the floor you are back at the starting position and ready to perform another repetition.
Perform the amount of repetitions prescribed in the program.
stretchingbeginner
Cat Stretch
Muscle
lower back
Equipment
Bodyweight
Also works
middle back, traps
How to do it
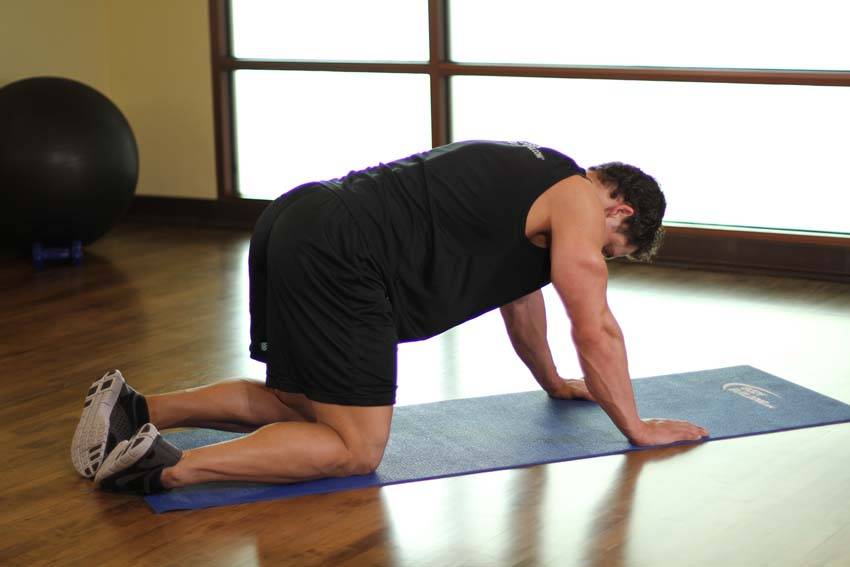
Position yourself on the floor on your hands and knees.
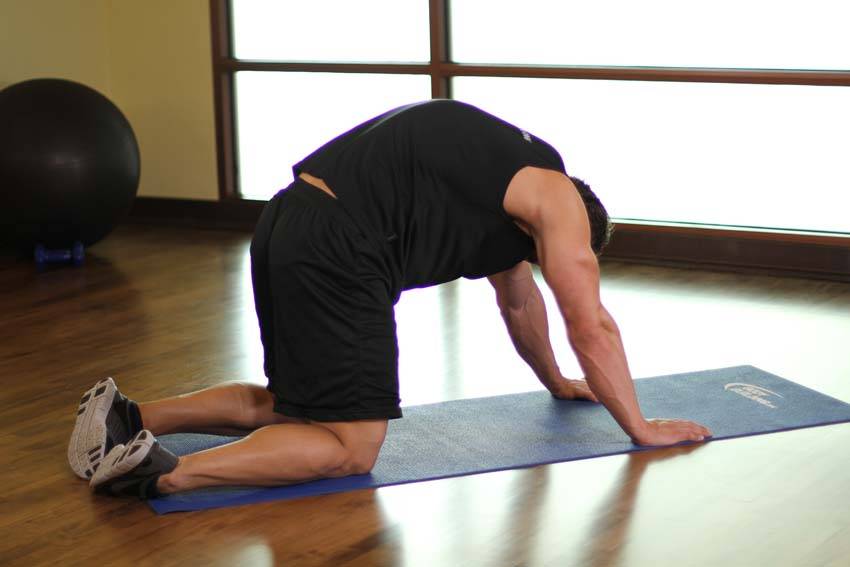
Pull your belly in and round your spine, lower back, shoulders, and neck, letting your head drop.
Hold for 15 seconds.
stretchingbeginner
Child's Pose
Muscle
lower back
Equipment
Bodyweight
Also works
glutes, middle back
How to do it
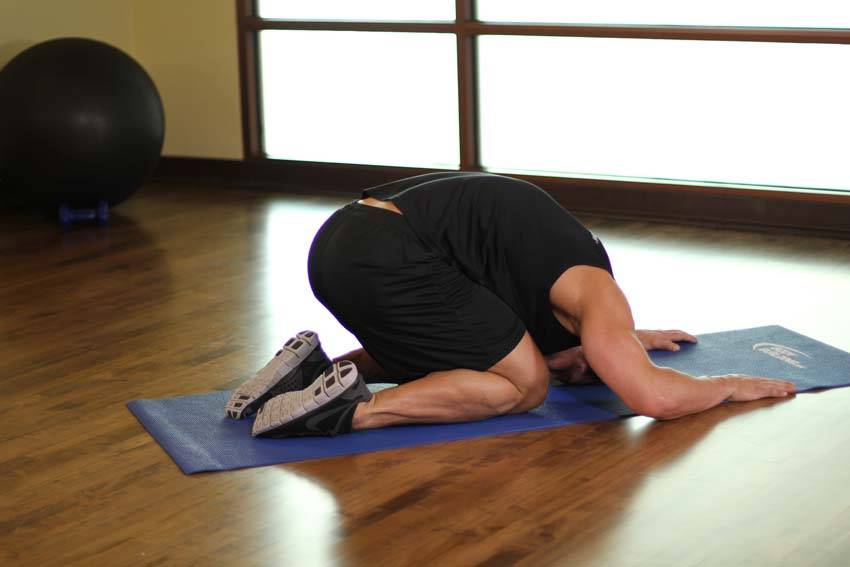
Get on your hands and knees, walk your hands in front of you.
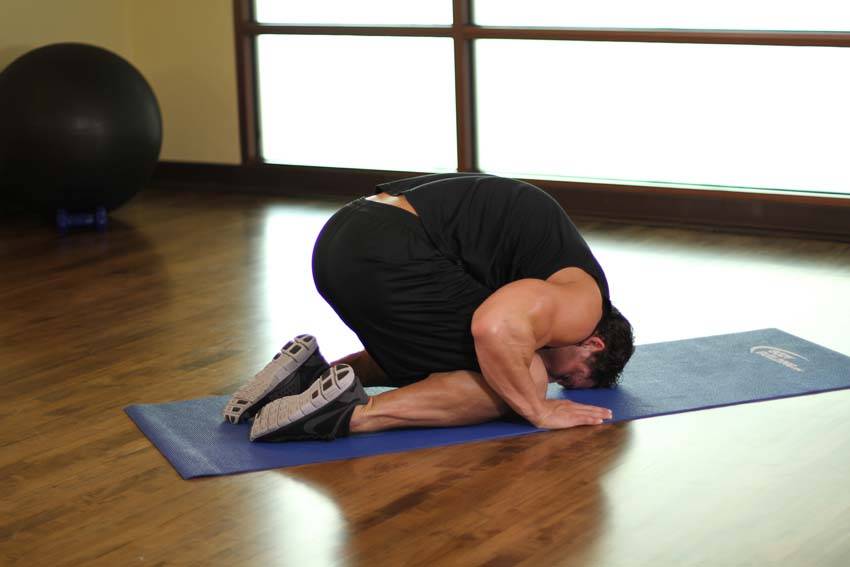
Lower your buttocks down to sit on your heels. Let your arms drag along the floor as you sit back to stretch your entire spine.
Once you settle onto your heels, bring your hands next to your feet and relax. "breathe" into your back. Rest your forehead on the floor. Avoid this position if you have knee problems.
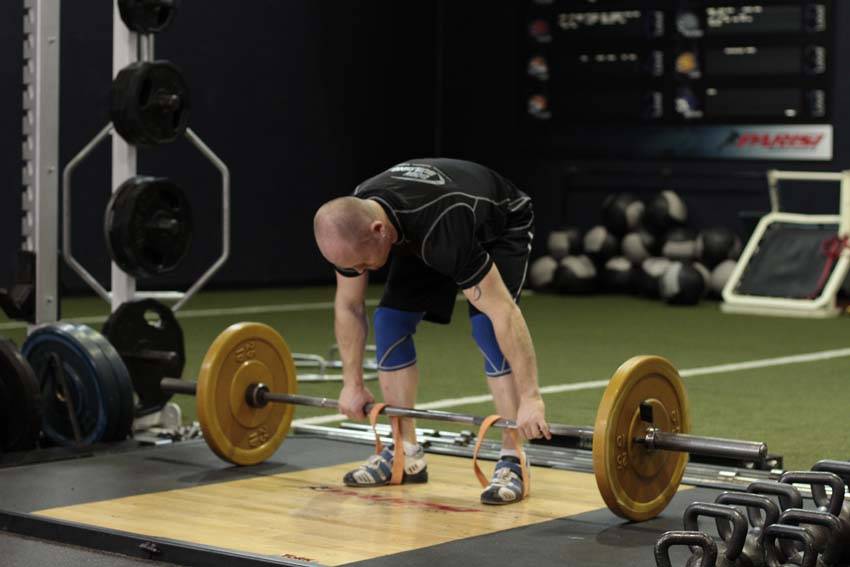
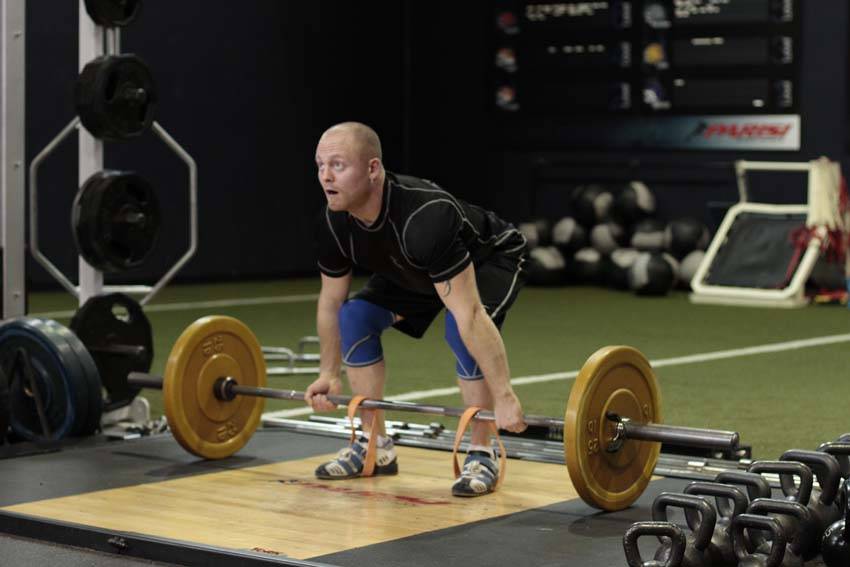
To deadlift with short bands, simply loop them over the bar before you start, and step into them to set up. For long bands, they will need to be anchored to a secure base, such as heavy dumbbells or a rack.
With your feet, and your grip set, take a big breath and then lower your hips and bend the knees until your shins contact the bar. Look forward with your head, keep your chest up and your back arched, and begin driving through the heels to move the weight upward. After the bar passes the knees, aggressively pull the bar back, pulling your shoulder blades together as you drive your hips forward into the bar.
Lower the bar by bending at the hips and guiding it to the floor.
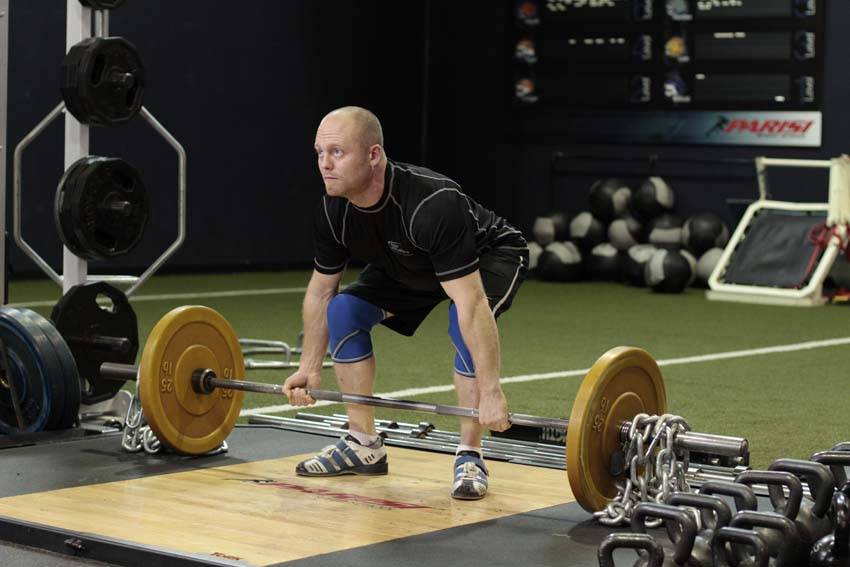
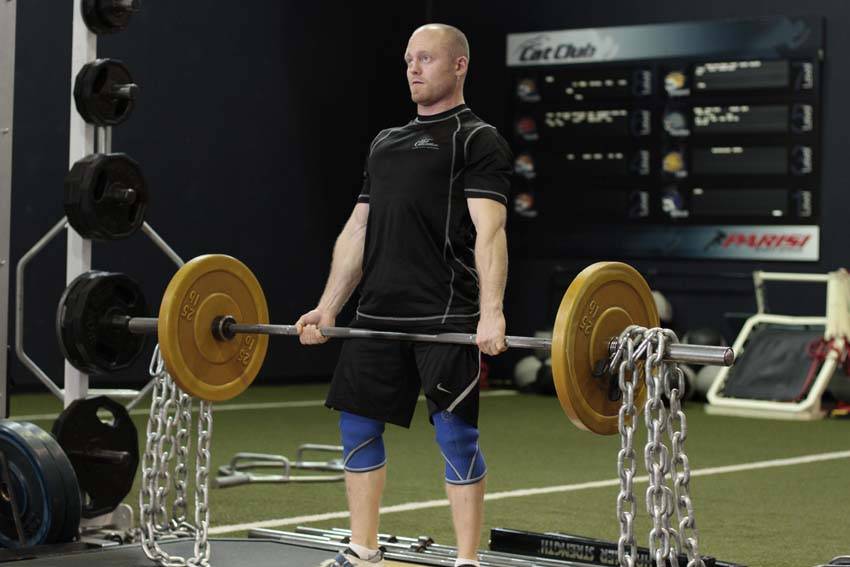
You can attach the chains to the sleeves of the bar, or just drape the middle over the bar so there is a greater weight increase as you lift.
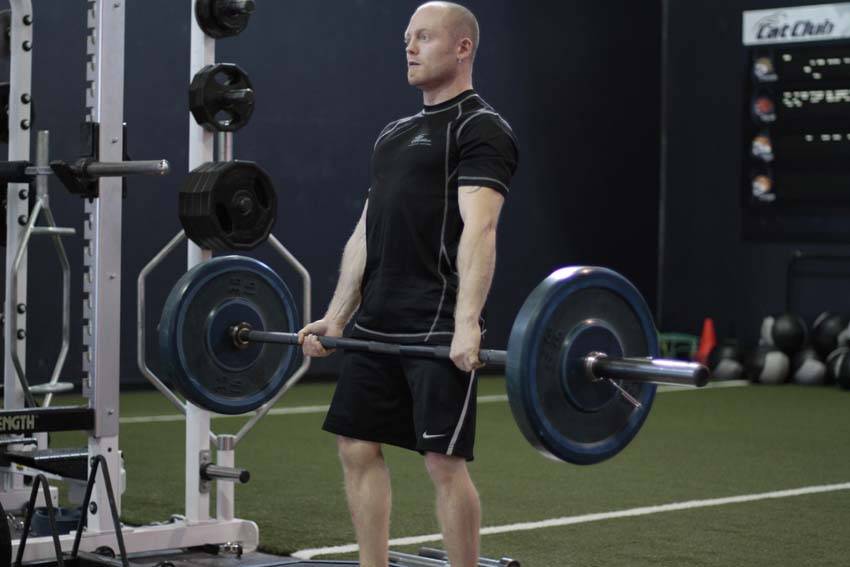
Approach the bar so that it is centered over your feet. You feet should be about hip width apart. Bend at the hip to grip the bar at shoulder width, allowing your shoulder blades to protract. Typically, you would use an overhand grip or an over/under grip on heavier sets. With your feet, and your grip set, take a big breath and then lower your hips and bend the knees until your shins contact the bar.
Look forward with your head, keep your chest up and your back arched, and begin driving through the heels to move the weight upward. After the bar passes the knees, aggressively pull the bar back, pulling your shoulder blades together as you drive your hips forward into the bar.
Lower the bar by bending at the hips and guiding it to the floor.
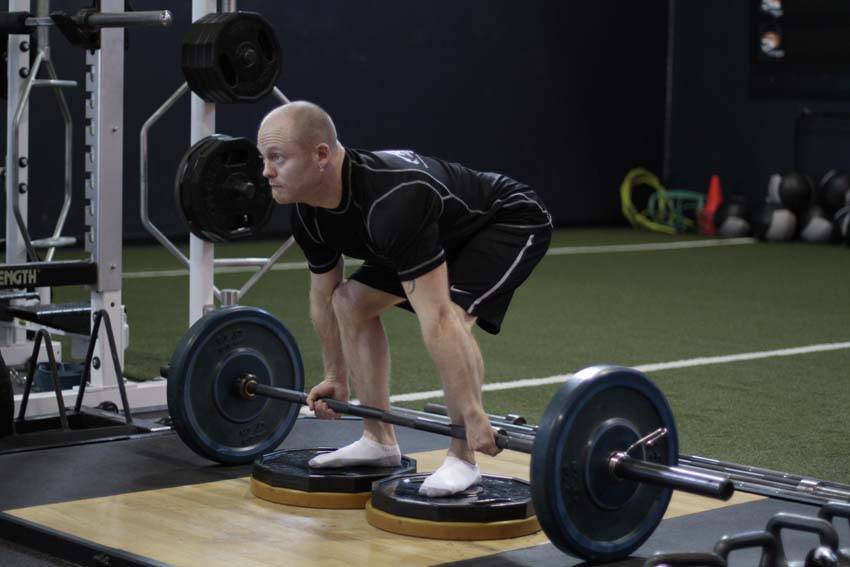
Begin by having a platform or weight plates that you can stand on, usually 1-3 inches in height. Approach the bar so that it is centered over your feet. You feet should be about hip width apart. Bend at the hip to grip the bar at shoulder width, allowing your shoulder blades to protract. Typically, you would use an overhand grip or an over/under grip on heavier sets.
With your feet, and your grip set, take a big breath and then lower your hips and bend the knees until your shins contact the bar. Look forward with your head, keep your chest up and your back arched, and begin driving through the heels to move the weight upward. After the bar passes the knees, aggressively pull the bar back, pulling your shoulder blades together as you drive your hips forward into the bar.
Lower the bar by bending at the hips and guiding it to the floor.
stretchingbeginner
Hug A Ball
Muscle
lower back
Equipment
exercise ball
Also works
calves, glutes
How to do it
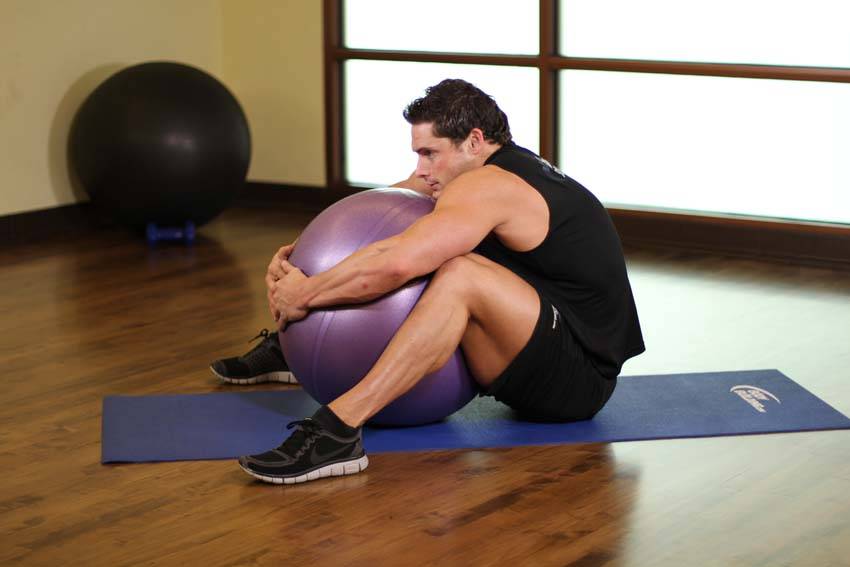
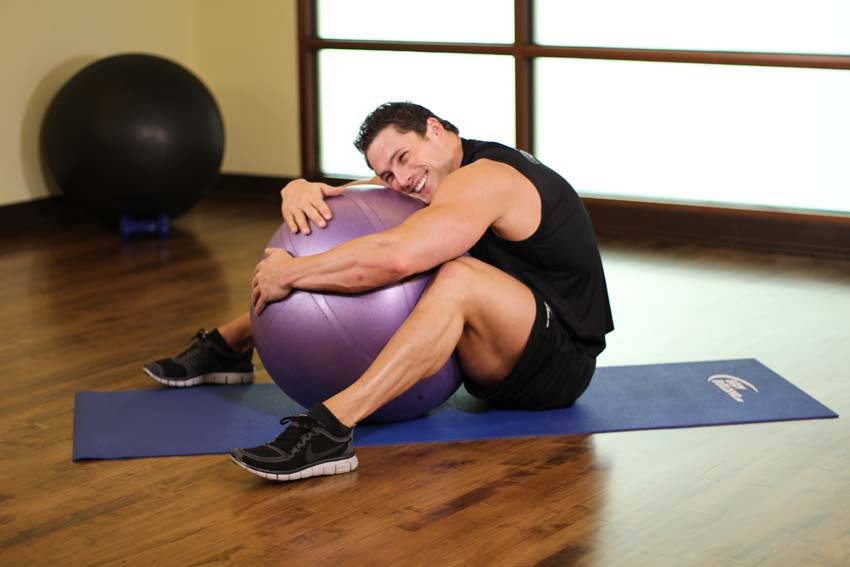
Seat yourself on the floor.
Straddle an exercise ball between both legs and lower your hips down toward the floor.
Hug your arms around the ball to support your body. Adjust your legs so that your feet are flat on the floor and your knees line up over your ankles. Keep a good grip on the ball so it doesn't roll away from you and send you back onto your buttocks.
stretchingbeginner
Hug Knees To Chest
Muscle
lower back
Equipment
Bodyweight
Also works
glutes
How to do it
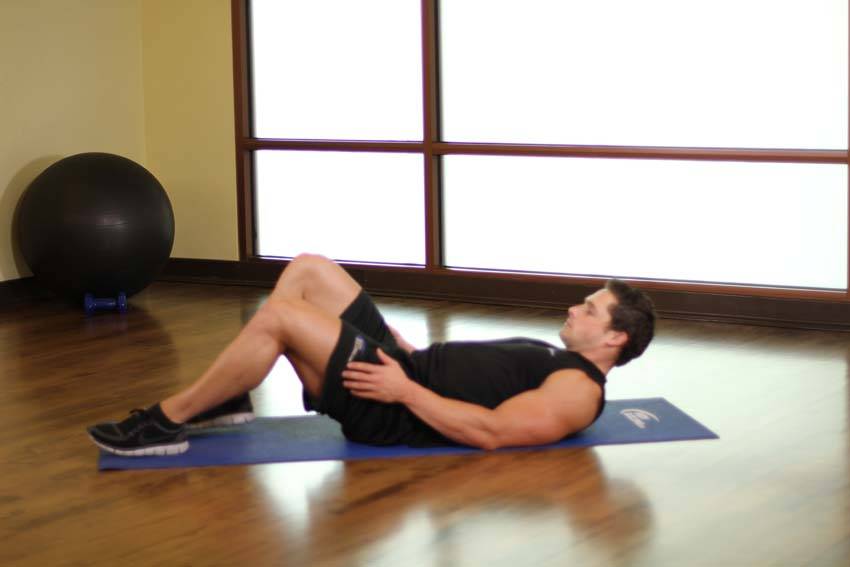
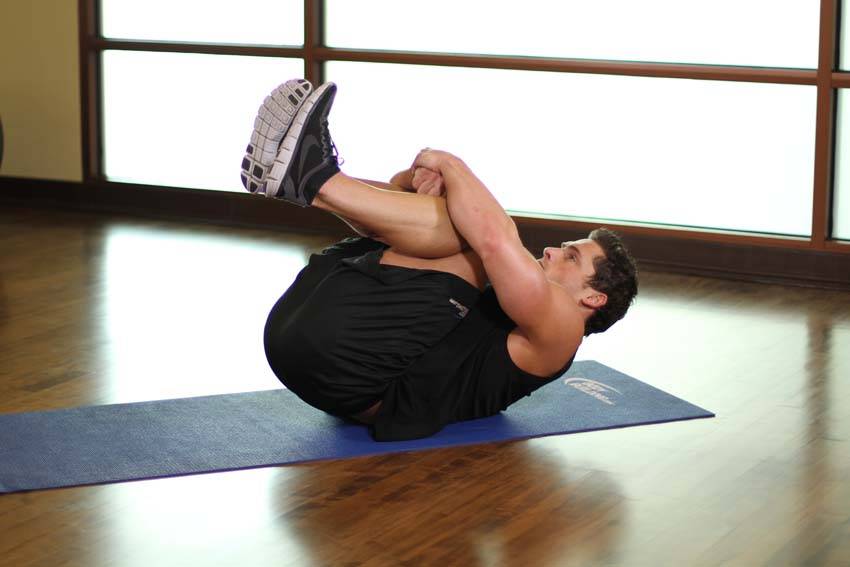
Lie down on your back and pull both knees up to your chest.
Hold your arms under the knees, not over (that would put to much pressure on your knee joints).
Slowly pull the knees toward your shoulders. This also stretches your buttocks muscles.
strengthbeginner
Hyperextensions (Back Extensions)
Muscle
lower back
Equipment
other
Also works
glutes, hamstrings
How to do it
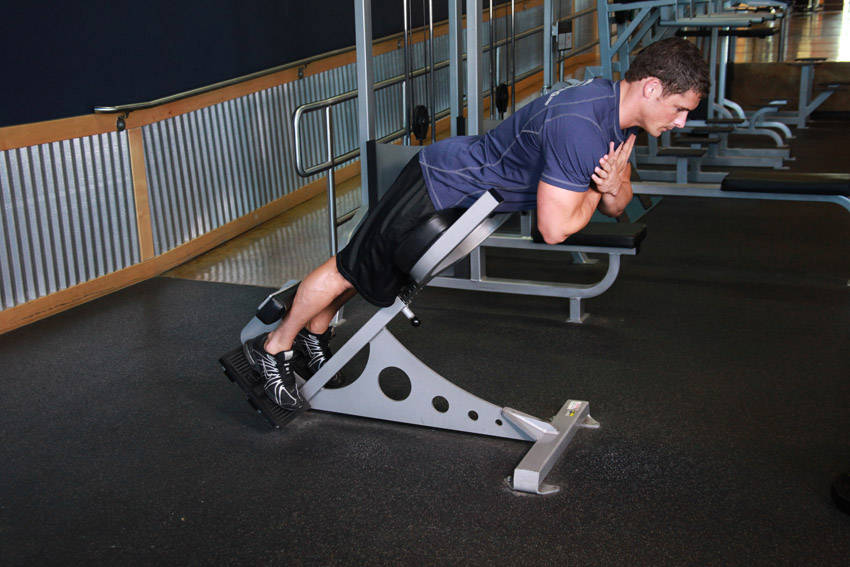
Lie face down on a hyperextension bench, tucking your ankles securely under the footpads.
Adjust the upper pad if possible so your upper thighs lie flat across the wide pad, leaving enough room for you to bend at the waist without any restriction.
With your body straight, cross your arms in front of you (my preference) or behind your head. This will be your starting position. Tip: You can also hold a weight plate for extra resistance in front of you under your crossed arms.
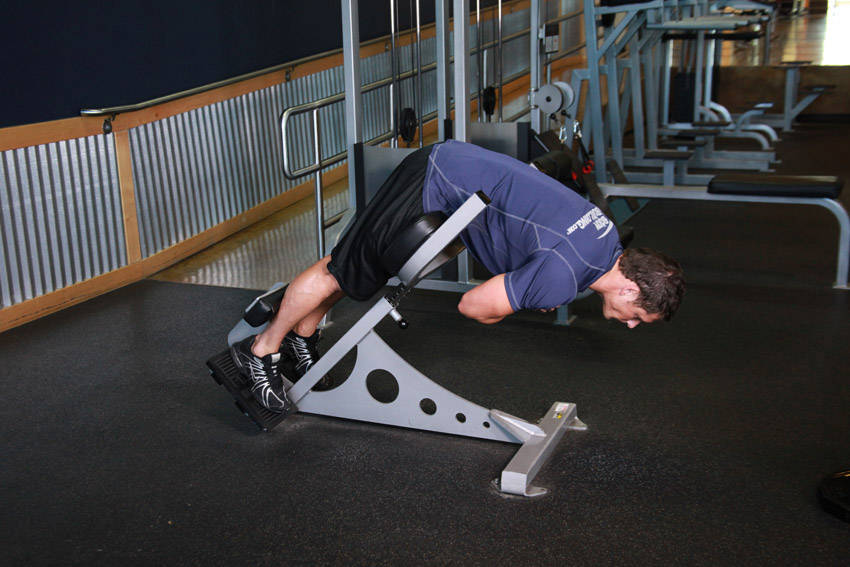
Start bending forward slowly at the waist as far as you can while keeping your back flat. Inhale as you perform this movement. Keep moving forward until you feel a nice stretch on the hamstrings and you can no longer keep going without a rounding of the back. Tip: Never round the back as you perform this exercise. Also, some people can go farther than others. The key thing is that you go as far as your body allows you to without rounding the back.
Slowly raise your torso back to the initial position as you inhale. Tip: Avoid the temptation to arch your back past a straight line. Also, do not swing the torso at any time in order to protect the back from injury.
Repeat for the recommended amount of repetitions.
strengthintermediate
Hyperextensions With No Hyperextension Bench
Muscle
lower back
Equipment
Bodyweight
Also works
glutes, hamstrings
How to do it
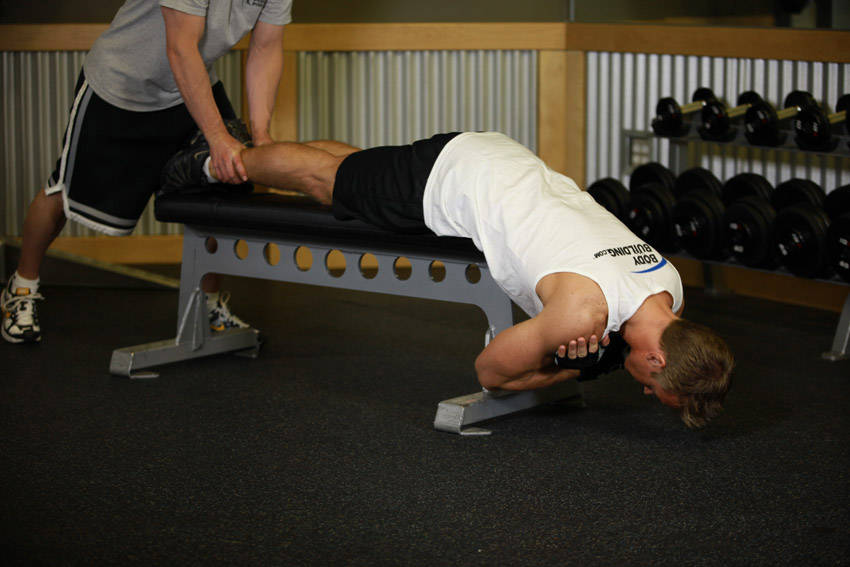
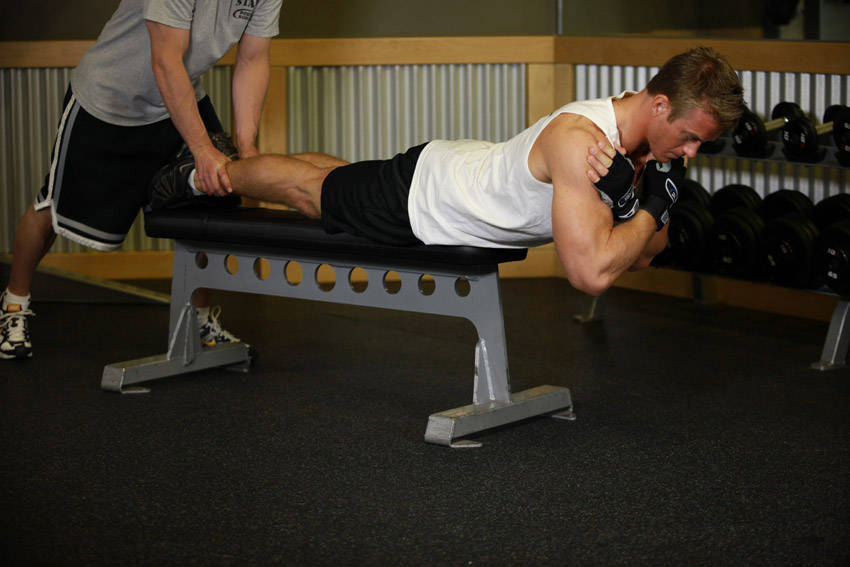
With someone holding down your legs, slide yourself down to the edge a flat bench until your hips hang off the end of the bench. Tip: Your entire upper body should be hanging down towards the floor. Also, you will be in the same position as if you were on a hyperextension bench but the range of motion will be shorter due to the height of the flat bench vs. that of the hyperextension bench.
With your body straight, cross your arms in front of you (my preference) or behind your head. This will be your starting position. Tip: You can also hold a weight plate for extra resistance in front of you under your crossed arms.
Start bending forward slowly at the waist as far as you can while keeping your back flat. Inhale as you perform this movement. Keep moving forward until you almost touch the floor or you feel a nice stretch on the hamstrings (whichever comes first). Tip: Never round the back as you perform this exercise.
Slowly raise your torso back to the initial position as you exhale. Tip: Avoid the temptation to arch your back past a straight line. Also, do not swing the torso at any time in order to protect the back from injury.
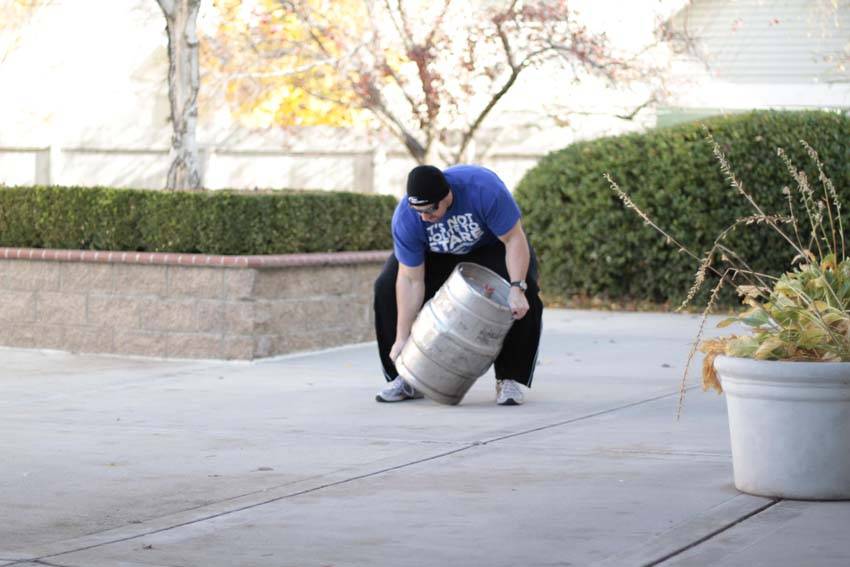
To load kegs, place the desired number a distance from the loading platform, typically 30-50 feet.
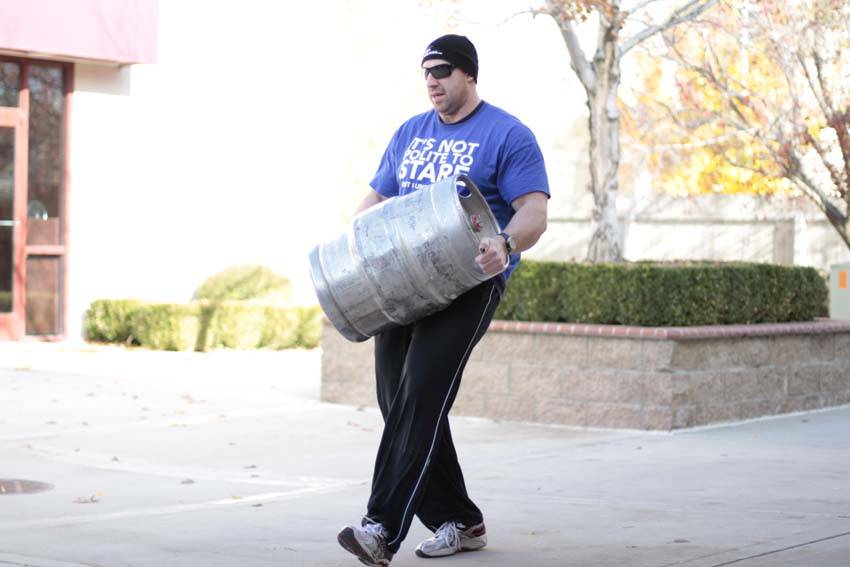
Begin by grabbing the close handle of the first keg, tilting it onto its side to grab the opposite edge of the bottom of the keg. Lift the keg up to your chest.
The higher you can place the keg, the faster you should be able to move to the platform. Shouldering is usually not allowed. Be sure to keep a firm hold on the keg. Move as quickly as possible to the platform, and load it, extending through your hips, knees, and ankles to get it as high as possible.
Return to the starting position to retrieve the next keg, and repeat until the event is completed.
stretchingbeginner
Lower Back-SMR
Muscle
lower back
Equipment
foam roll
Also works
Nothing else
How to do it
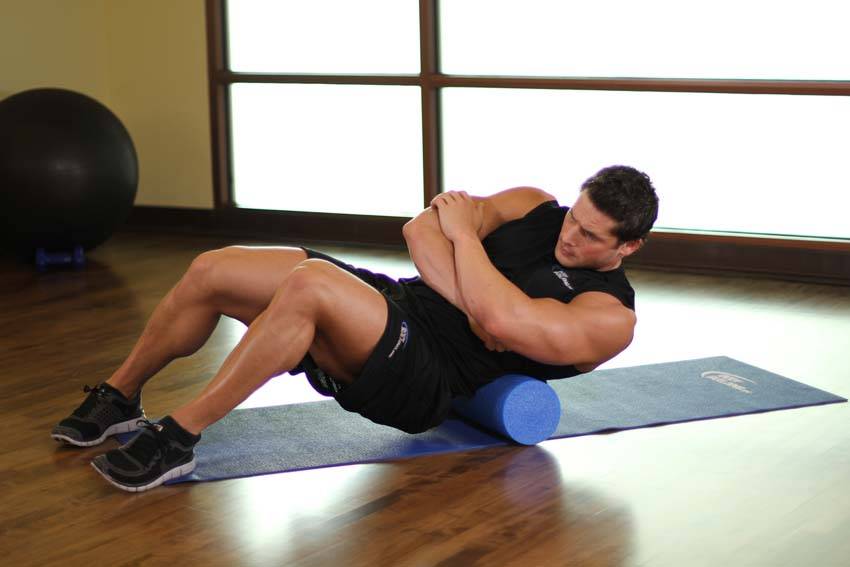
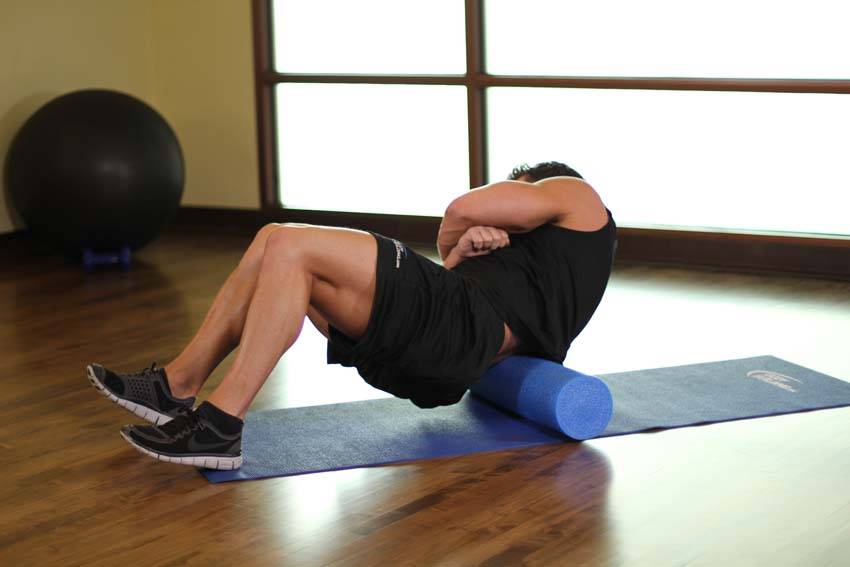
In a seated position, place a foam roll under your lower back. Cross your arms in front of you and protract your shoulders. This will be your starting position.
Raise your hips off of the floor and lean back, keeping your weight on your lower back. Now shift your weight slightly to one side, keeping your weight off of the spine and on the muscles to the side of it. Roll over your lower back, holding points of tension for 10-30 seconds. Repeat on the other side.
stretchingintermediate
Pelvic Tilt Into Bridge
Muscle
lower back
Equipment
Bodyweight
Also works
Nothing else
How to do it
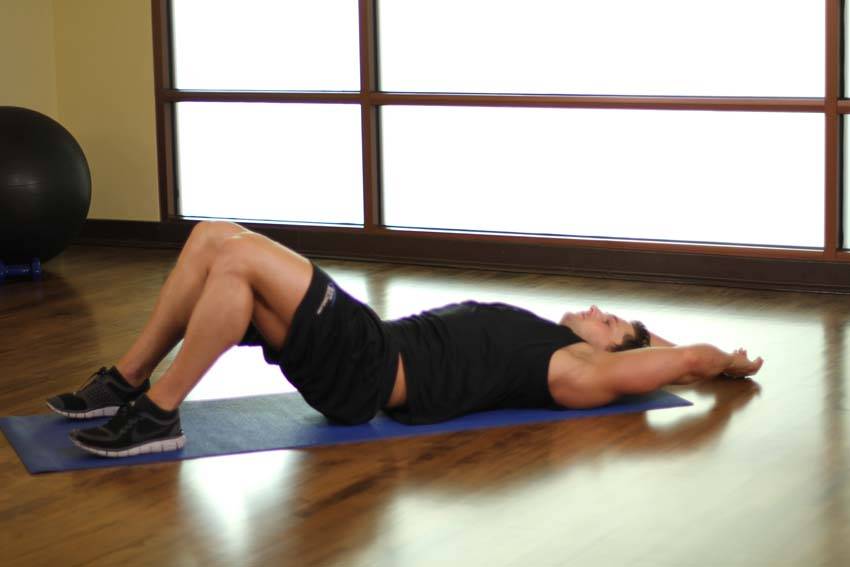
Lie down with your feet on the floor, heels directly under your knees.
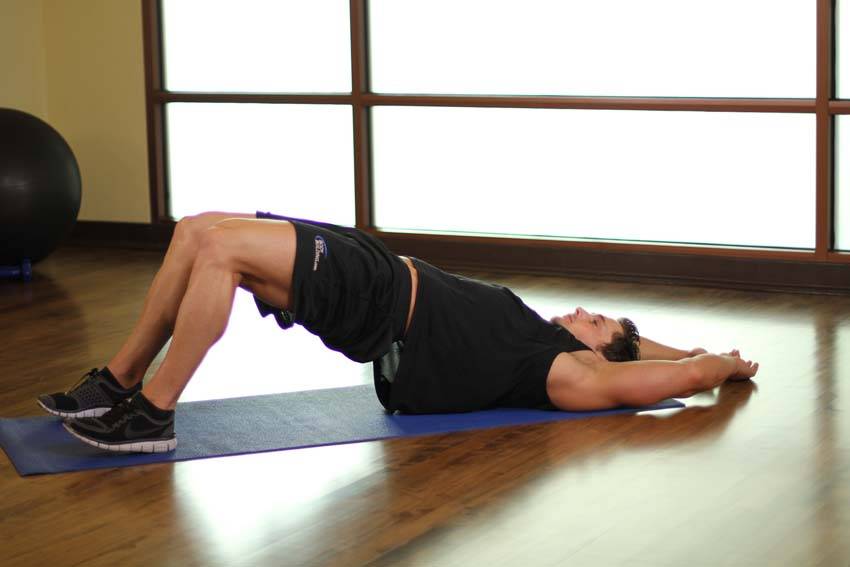
Lift only your tailbone to the ceiling to stretch your lower back. (Don't lift the entire spine yet.) Pull in your stomach.
To go into a bridge, lift the entire spine except the neck.
stretchingbeginner
Pyramid
Muscle
lower back
Equipment
exercise ball
Also works
shoulders
How to do it
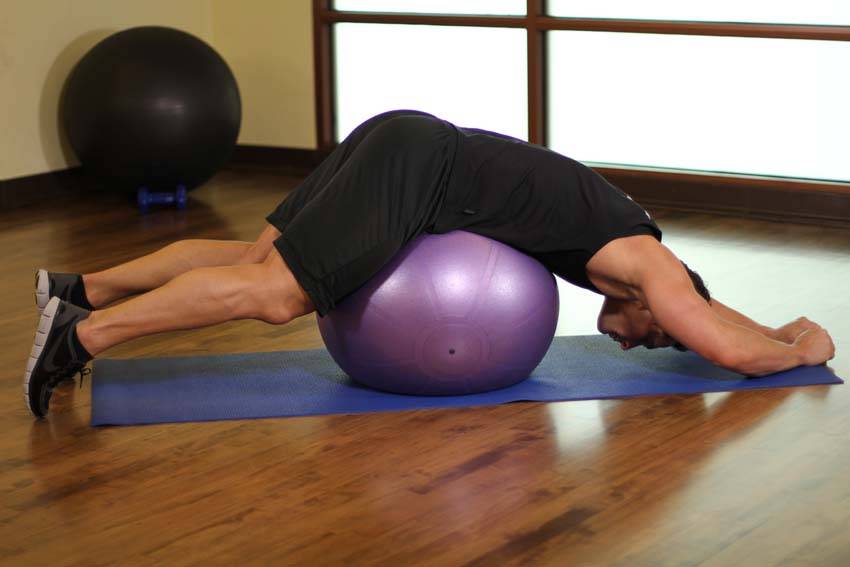
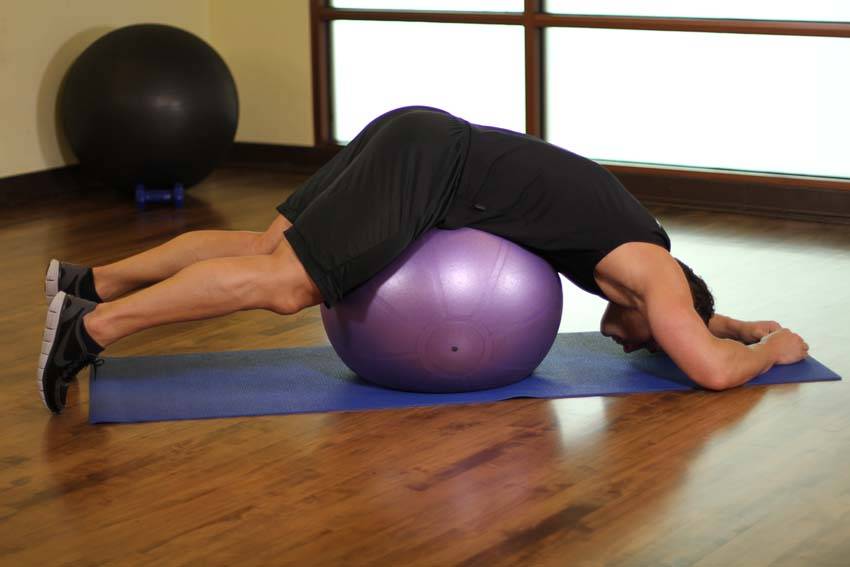
Start off by rolling your torso forward onto the ball so your hips rest on top of the ball and become the highest point of your body.
Rest your hands and feet on the floor. Your arms and legs can be slightly bent or straight, depending on the size of the ball, your flexibility, and the length of your limbs. This also helps develop stabilizing strength in your torso and shoulders.
powerliftingintermediate
Rack Pull with Bands
Muscle
lower back
Equipment
barbell
Also works
forearms, glutes, hamstrings, quadriceps, traps
How to do it
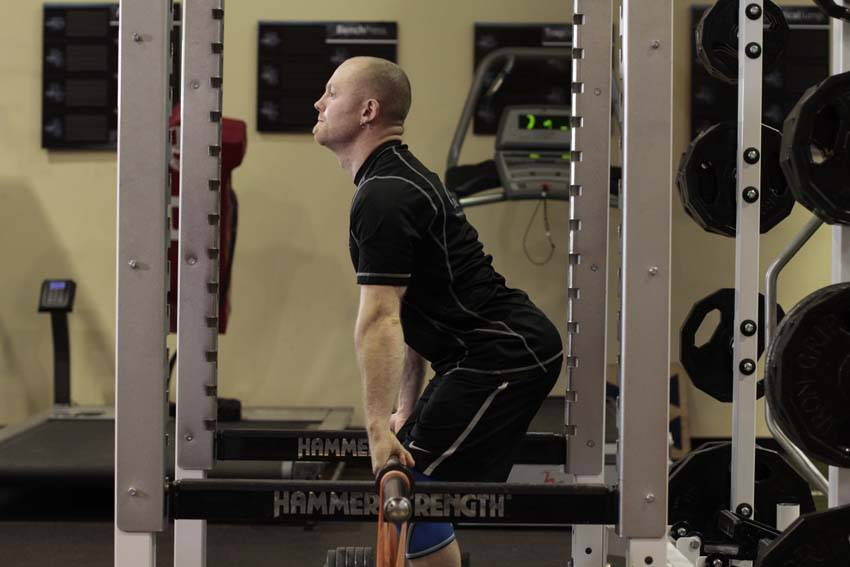
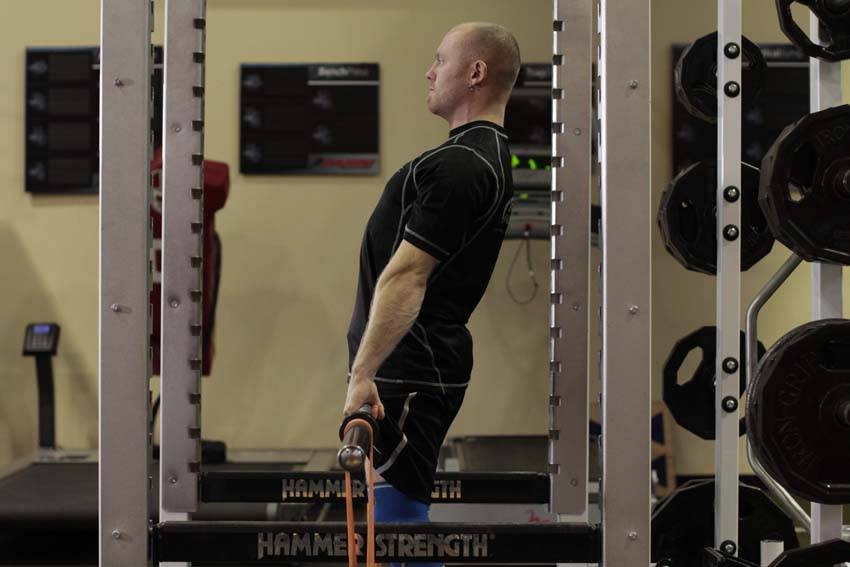
Set up in a power rack with the bar on the pins. The pins should be set to the desired point; just below the knees, just above, or in the mid thigh position. Attach bands to the base of the rack, or secure them with dumbbells. Attach the other end to the bar. You may need to choke the bands to provide tension.
Position yourself against the bar in proper deadlifting position. Your feet should be under your hips, your grip shoulder width, back arched, and hips back to engage the hamstrings. Since the weight is typically heavy, you may use a mixed grip, a hook grip, or use straps to aid in holding the weight.
With your head looking forward, extend through the hips and knees, pulling the weight up and back until lockout. Be sure to pull your shoulders back as you complete the movement. Return the weight to the pins and repeat.
powerliftingintermediate
Rack Pulls
Muscle
lower back
Equipment
barbell
Also works
forearms, glutes, hamstrings, traps
How to do it
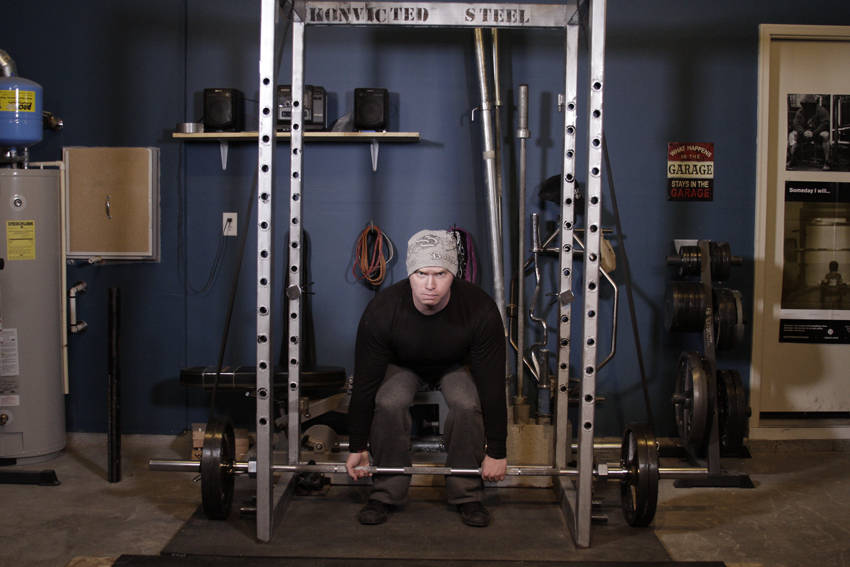
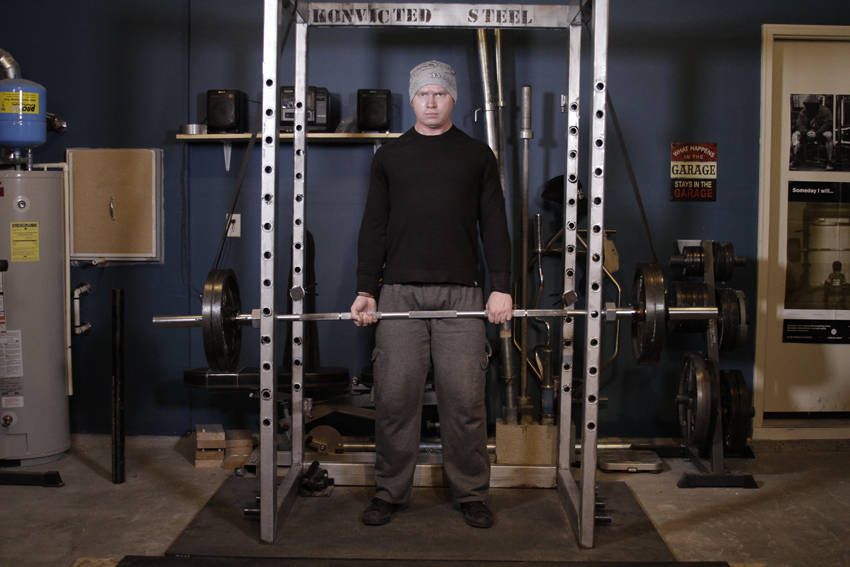
Set up in a power rack with the bar on the pins. The pins should be set to the desired point; just below the knees, just above, or in the mid thigh position. Position yourself against the bar in proper deadlifting position. Your feet should be under your hips, your grip shoulder width, back arched, and hips back to engage the hamstrings. Since the weight is typically heavy, you may use a mixed grip, a hook grip, or use straps to aid in holding the weight.
With your head looking forward, extend through the hips and knees, pulling the weight up and back until lockout. Be sure to pull your shoulders back as you complete the movement.
Set the bar up in a power rack. Attach bands to the top of the rack, using either bands pegs or the frame itself. Attach the other end of the bands to the bar.
Approach the bar so that it is centered over your feet. You feet should be about hip width apart. Bend at the hip to grip the bar at shoulder width, allowing your shoulder blades to protract. Typically, you would use an overhand grip or an over/under grip on heavier sets.
With your feet, and your grip set, take a big breath and then lower your hips and bend the knees until your shins contact the bar. Look forward with your head, keep your chest up and your back arched, and begin driving through the heels to move the weight upward.
After the bar passes the knees, aggressively pull the bar back, pulling your shoulder blades together as you drive your hips forward into the bar.
Lower the bar by bending at the hips and guiding it to the floor.
powerliftingintermediate
Seated Good Mornings
Muscle
lower back
Equipment
barbell
Also works
glutes
How to do it
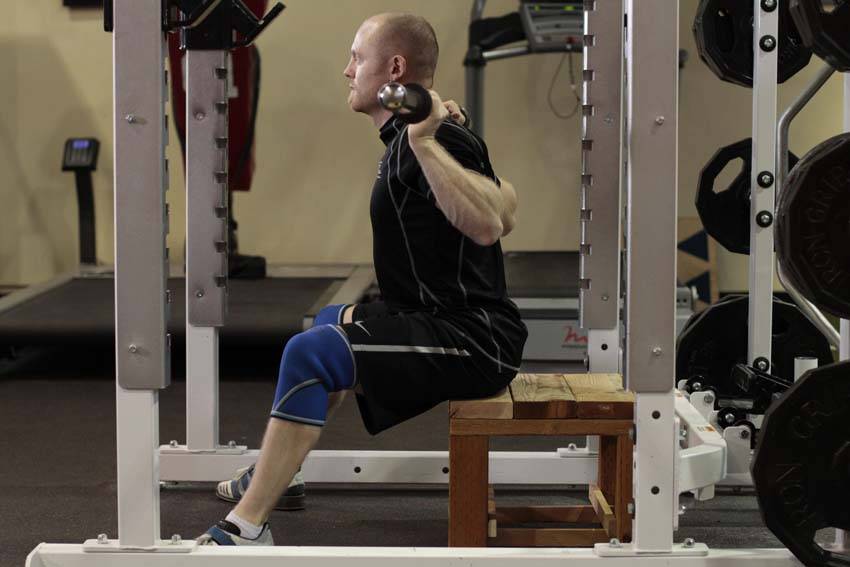
Set up a box in a power rack. The pins should be set at an appropriate height. Begin by stepping under the bar and placing it across the back of the shoulders, not on top of your traps. Squeeze your shoulder blades together and rotate your elbows forward, attempting to bend the bar across your shoulders.
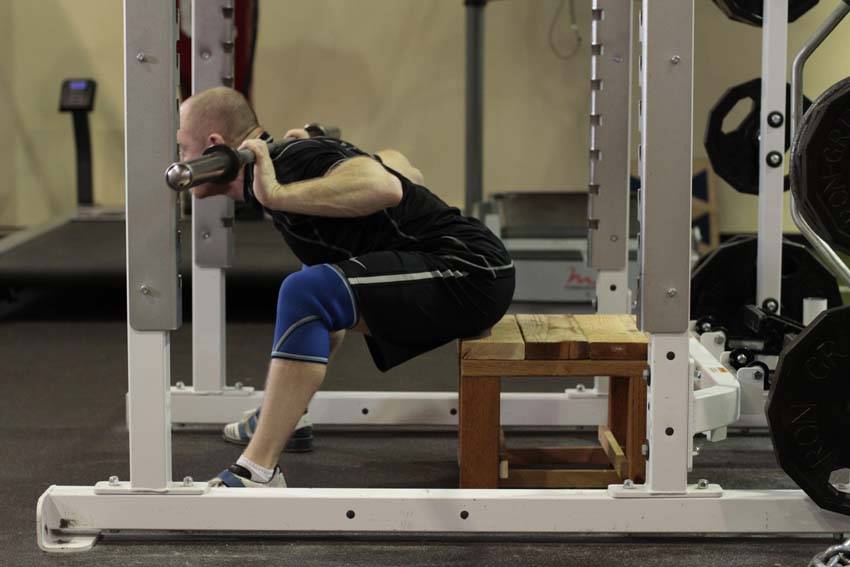
Remove the bar from the rack, creating a tight arch in your lower back. Keep your head facing forward. With your back, shoulders, and core tight, push your knees and butt out and you begin your descent. Sit back with your hips until you are seated on the box. This will be your starting position.
Keeping the bar tight, bend forward at the hips as much as possible. If you set the pins to what would be parallel, you not only have a safety if you fail, but know when to stop.
Pause just above the pins and reverse the motion until your torso it upright.
stretchingbeginner
Standing Pelvic Tilt
Muscle
lower back
Equipment
Bodyweight
Also works
glutes
How to do it
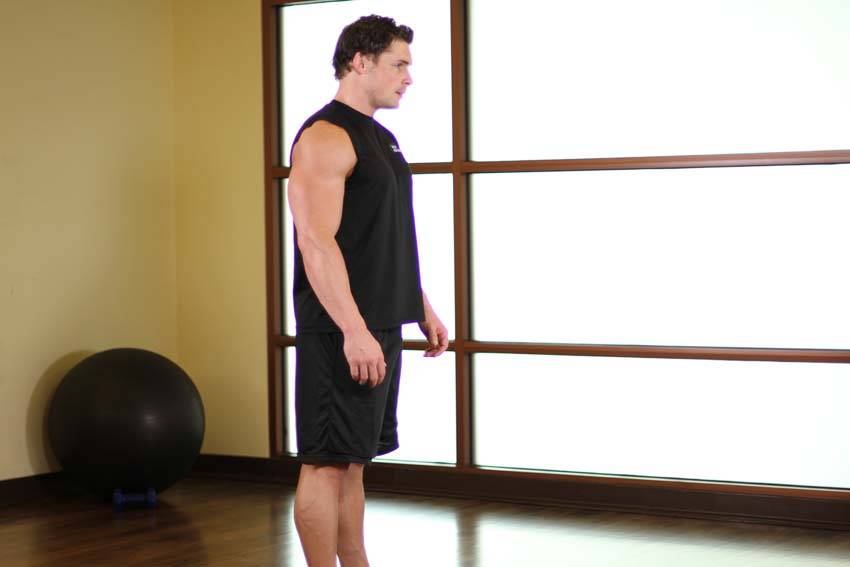
Start off with your feet hip-distance apart.
Bend your knees slightly to keep them soft and springy.
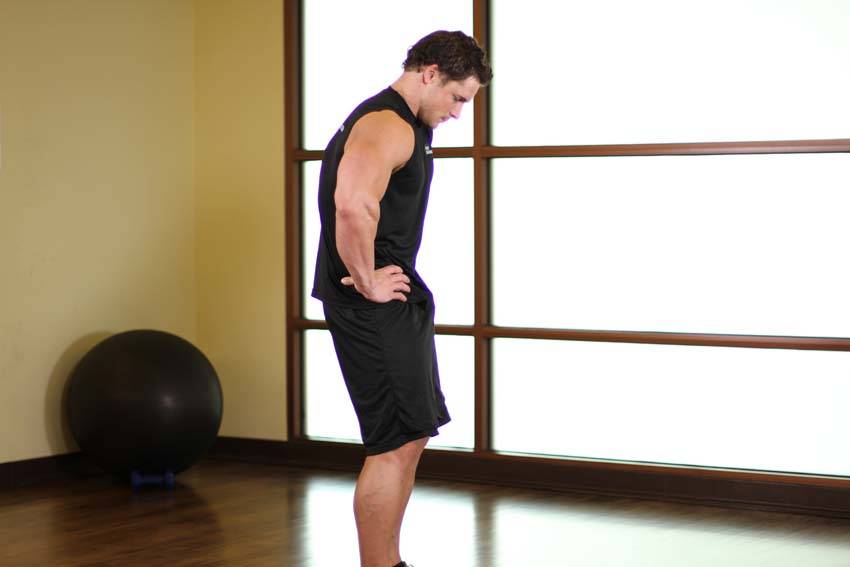
You may want to move your pelvis forward and backward and back few times before holding the tailbone forward in this stretch.
Exercise data from the Free Exercise DB (public domain).