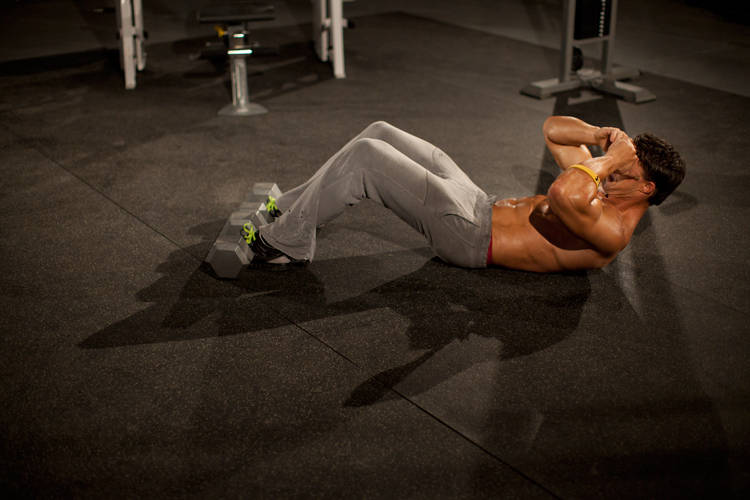
Lie down on the floor and secure your feet. Your legs should be bent at the knees.
Place your hands behind or to the side of your head. You will begin with your back on the ground. This will be your starting position.
Flex your hips and spine to raise your torso toward your knees.
At the top of the contraction your torso should be perpendicular to the ground. Reverse the motion, going only ¾ of the way down.
Repeat for the recommended amount of repetitions.
strengthintermediate
Ab Crunch Machine
Muscle
abdominals
Equipment
machine
Also works
Nothing else
How to do it
Select a light resistance and sit down on the ab machine placing your feet under the pads provided and grabbing the top handles. Your arms should be bent at a 90 degree angle as you rest the triceps on the pads provided. This will be your starting position.
At the same time, begin to lift the legs up as you crunch your upper torso. Breathe out as you perform this movement. Tip: Be sure to use a slow and controlled motion. Concentrate on using your abs to move the weight while relaxing your legs and feet.
After a second pause, slowly return to the starting position as you breathe in.
Repeat the movement for the prescribed amount of repetitions.
strengthintermediate
Ab Roller
Muscle
abdominals
Equipment
other
Also works
shoulders
How to do it
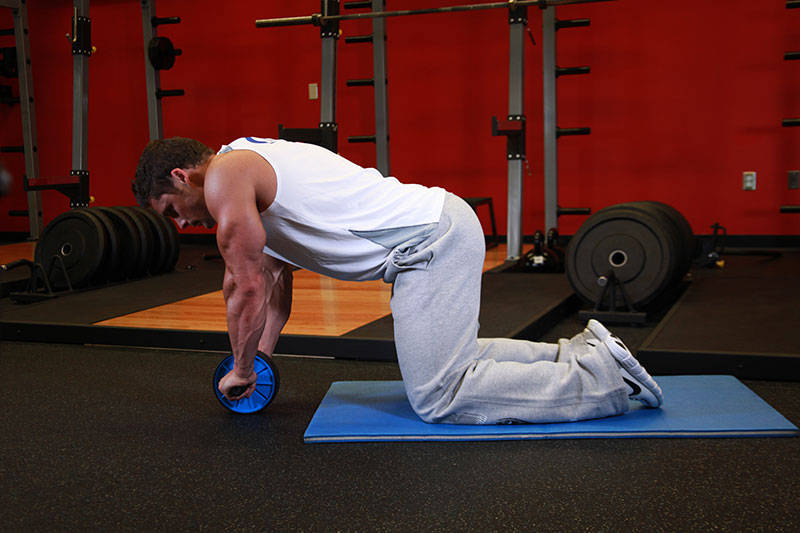
Hold the Ab Roller with both hands and kneel on the floor.
Now place the ab roller on the floor in front of you so that you are on all your hands and knees (as in a kneeling push up position). This will be your starting position.
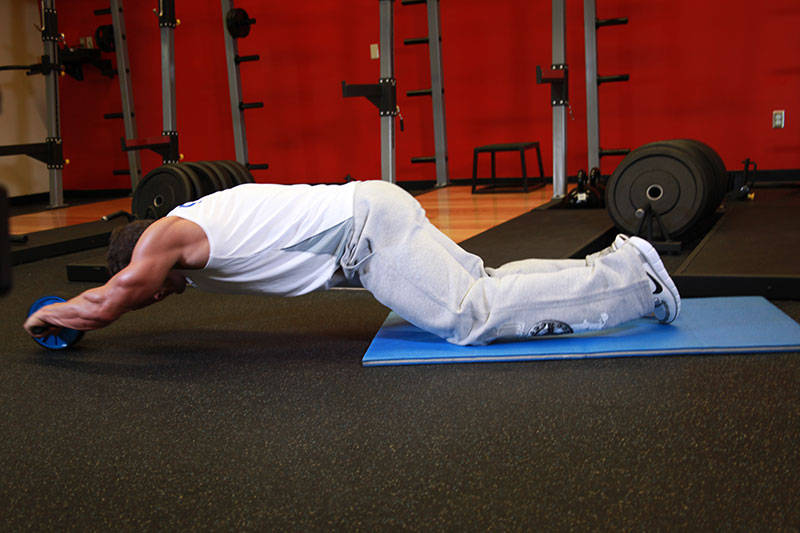
Slowly roll the ab roller straight forward, stretching your body into a straight position. Tip: Go down as far as you can without touching the floor with your body. Breathe in during this portion of the movement.
After a pause at the stretched position, start pulling yourself back to the starting position as you breathe out. Tip: Go slowly and keep your abs tight at all times.
strengthintermediate
Advanced Kettlebell Windmill
Muscle
abdominals
Equipment
kettlebells
Also works
glutes, hamstrings, shoulders
How to do it
Clean and press a kettlebell overhead with one arm.
Keeping the kettlebell locked out at all times, push your butt out in the direction of the locked out kettlebell. Keep the non-working arm behind your back and turn your feet out at a forty-five degree angle from the arm with the kettlebell.
Lower yourself as far as possible.
Pause for a second and reverse the motion back to the starting position.
strengthbeginner
Air Bike
Muscle
abdominals
Equipment
Bodyweight
Also works
Nothing else
How to do it
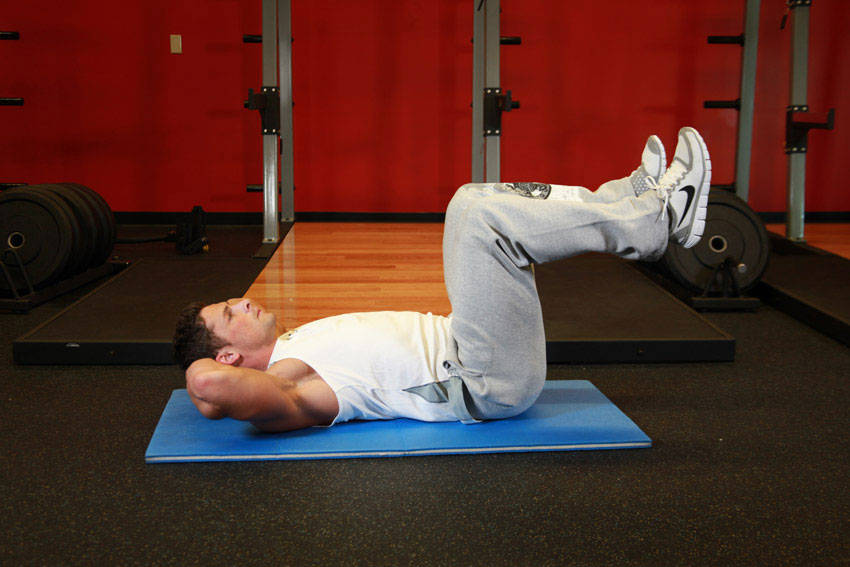
Lie flat on the floor with your lower back pressed to the ground. For this exercise, you will need to put your hands beside your head. Be careful however to not strain with the neck as you perform it. Now lift your shoulders into the crunch position.
Bring knees up to where they are perpendicular to the floor, with your lower legs parallel to the floor. This will be your starting position.
Now simultaneously, slowly go through a cycle pedal motion kicking forward with the right leg and bringing in the knee of the left leg. Bring your right elbow close to your left knee by crunching to the side, as you breathe out.
Go back to the initial position as you breathe in.
Crunch to the opposite side as you cycle your legs and bring closer your left elbow to your right knee and exhale.
Continue alternating in this manner until all of the recommended repetitions for each side have been completed.
strengthbeginner
Alternate Heel Touchers
Muscle
abdominals
Equipment
Bodyweight
Also works
Nothing else
How to do it
Lie on the floor with the knees bent and the feet on the floor around 18-24 inches apart. Your arms should be extended by your side. This will be your starting position.
Crunch over your torso forward and up about 3-4 inches to the right side and touch your right heel as you hold the contraction for a second. Exhale while performing this movement.
Now go back slowly to the starting position as you inhale.
Now crunch over your torso forward and up around 3-4 inches to the left side and touch your left heel as you hold the contraction for a second. Exhale while performing this movement and then go back to the starting position as you inhale. Now that both heels have been touched, that is considered 1 repetition.
Continue alternating sides in this manner until all prescribed repetitions are done.
strengthintermediate
Barbell Ab Rollout
Muscle
abdominals
Equipment
barbell
Also works
lower back, shoulders
How to do it
For this exercise you will need to get into a pushup position, but instead of having your hands of the floor, you will be grabbing on to an Olympic barbell (loaded with 5-10 lbs on each side) instead. This will be your starting position.
While keeping a slight arch on your back, lift your hips and roll the barbell towards your feet as you exhale. Tip: As you perform the movement, your glutes should be coming up, you should be keeping the abs tight and should maintain your back posture at all times. Also your arms should be staying perpendicular to the floor throughout the movement. If you don't, you will work out your shoulders and back more than the abs.
After a second contraction at the top, start to roll the barbell back forward to the starting position slowly as you inhale.
Repeat for the recommended amount of repetitions.
strengthexpert
Barbell Ab Rollout - On Knees
Muscle
abdominals
Equipment
barbell
Also works
lower back, shoulders
How to do it
Hold an Olympic barbell loaded with 5-10lbs on each side and kneel on the floor.
Now place the barbell on the floor in front of you so that you are on all your hands and knees (as in a kneeling push up position). This will be your starting position.
Slowly roll the barbell straight forward, stretching your body into a straight position. Tip: Go down as far as you can without touching the floor with your body. Breathe in during this portion of the movement.
After a second pause at the stretched position, start pulling yourself back to the starting position as you breathe out. Tip: Go slowly and keep your abs tight at all times.
strengthintermediate
Barbell Rollout from Bench
Muscle
abdominals
Equipment
barbell
Also works
glutes, hamstrings, lats, shoulders
How to do it
Place a loaded barbell on the ground, near the end of a bench. Kneel with both legs on the bench, and take a medium to narrow grip on the barbell. This will be your starting position.
To begin, extend through the hips to slowly roll the bar forward. As you roll out, flex the shoulder to roll the bar above your head. Ensure that your arms remain extended throughout the movement.
When the bar has been moved as far forward as possible, return to the starting position.
strengthbeginner
Barbell Side Bend
Muscle
abdominals
Equipment
barbell
Also works
lower back
How to do it
Stand up straight while holding a barbell placed on the back of your shoulders (slightly below the neck). Your feet should be shoulder width apart. This will be your starting position.
While keeping your back straight and your head up, bend only at the waist to the right as far as possible. Breathe in as you bend to the side. Then hold for a second and come back up to the starting position as you exhale. Tip: Keep the rest of the body stationary.
Now repeat the movement but bending to the left instead. Hold for a second and come back to the starting position.
Clean a kettlebell to your shoulder. Clean the kettlebell to your shoulders by extending through the legs and hips as you raise the kettlebell towards your shoulder. The wrist should rotate as you do so. This will be your starting position.
Begin my leaning to the side opposite the kettlebell, continuing until you are able to touch the ground with your free hand, keeping your eyes on the kettlebell. As you do so, press the weight vertically be extending through the elbow, keeping your arm perpendicular to the ground.
Return to an upright position, with the kettlebell above your head. Return the kettlebell to the shoulder and repeat for the desired number of repetitions.
strengthbeginner
Bent-Knee Hip Raise
Muscle
abdominals
Equipment
Bodyweight
Also works
Nothing else
How to do it
Lay flat on the floor with your arms next to your sides.
Now bend your knees at around a 75 degree angle and lift your feet off the floor by around 2 inches.
Using your lower abs, bring your knees in towards you as you maintain the 75 degree angle bend in your legs. Continue this movement until you raise your hips off of the floor by rolling your pelvis backward. Breathe out as you perform this portion of the movement. Tip: At the end of the movement your knees will be over your chest.
Squeeze your abs at the top of the movement for a second and then return to the starting position slowly as you breathe in. Tip: Maintain a controlled motion at all times.
Repeat for the recommended amount of repetitions.
strengthbeginner
Bosu Ball Cable Crunch With Side Bends
Muscle
abdominals
Equipment
cable
Also works
Nothing else
How to do it
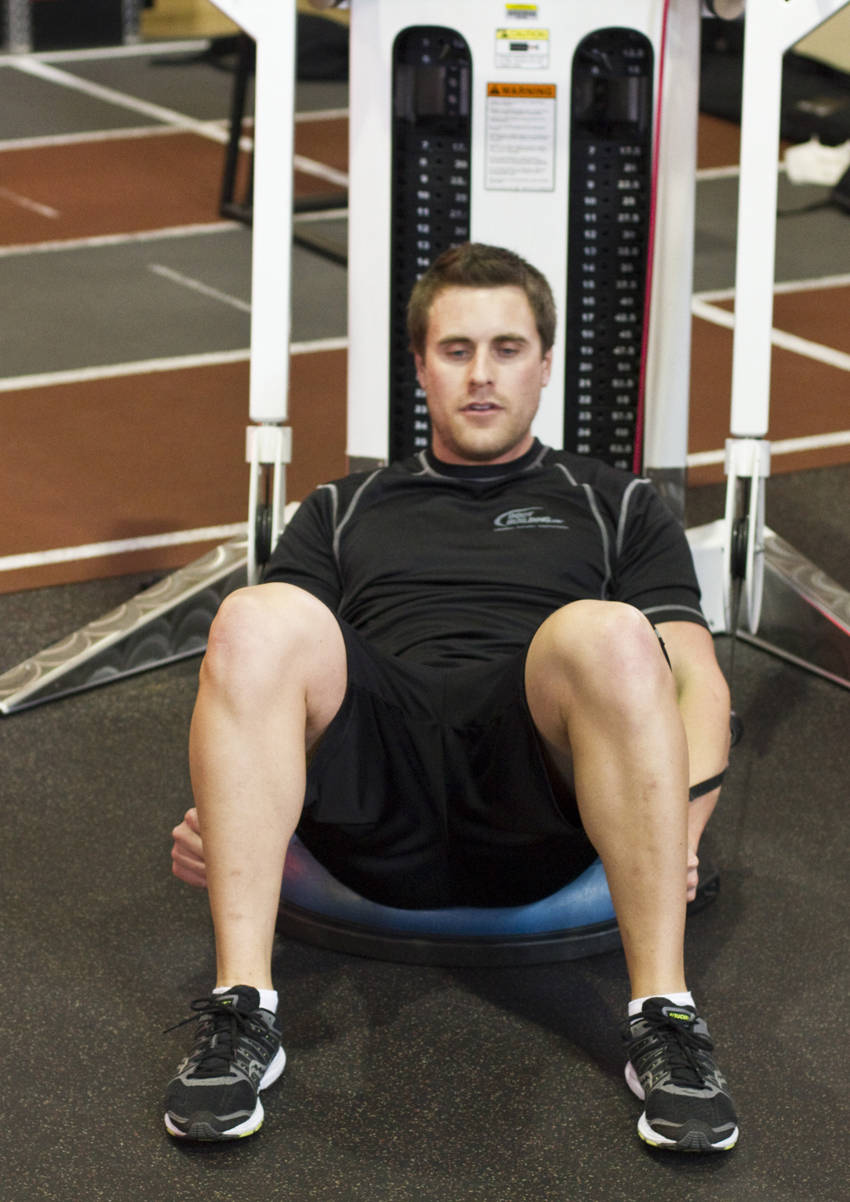
Connect a standard handle to each arm of a cable machine, and position them in the most downward position.
Grab a Bosu Ball and position it in front and center of the cable machine.
Lie down on the Bosu Ball with the small of your back arched around the ball. Your rear end should be close to the floor without touching it.
With both hands, reach back and grab the handle of each cable.
With your feet positioned in a wide stance, extend your arms straight out in front of you and in between your knees. Your hands should be at knee level.
Keep your arms straight and in-line with the upward angle of the cable. Elevate your torso in a crunching motion without dropping or bending your arms.
Maintain the rigid position with your arms. Slowly descend back to the starting position with your back arched around the Bosu Ball and your abdominals elongated.
Repeat the same series of movements to failure.
Once you reach failure, keep your abs tight and raise your torso into plank position so your back is elevated off the Bosu Ball.
Lower your arms down to your side; keep them straight. Start doing alternating side bends; reach for your heels! This finishing movement will focus on your obliques.
strengthbeginner
Bottoms Up
Muscle
abdominals
Equipment
Bodyweight
Also works
Nothing else
How to do it
Begin by lying on your back on the ground. Your legs should be straight and your arms at your side. This will be your starting position.
To perform the movement, tuck the knees toward your chest by flexing the hips and knees. Following this, extend your legs directly above you so that they are perpendicular to the ground. Rotate and elevate your pelvis to raise your glutes from the floor.
After a brief pause, return to the starting position.
strengthbeginner
Butt-Ups
Muscle
abdominals
Equipment
Bodyweight
Also works
Nothing else
How to do it
Begin a pushup position but with your elbows on the ground and resting on your forearms. Your arms should be bent at a 90 degree angle.
Arch your back slightly out rather than keeping your back completely straight.
Raise your glutes toward the ceiling, squeezing your abs tightly to close the distance between your ribcage and hips. The end result will be that you'll end up in a high bridge position. Exhale as you perform this portion of the movement.
Lower back down slowly to your starting position as you breathe in. Tip: Don't let your back sag downwards.
Repeat for the recommended amount of repetitions.
strengthbeginner
Cable Crunch
Muscle
abdominals
Equipment
cable
Also works
Nothing else
How to do it
Kneel below a high pulley that contains a rope attachment.
Grasp cable rope attachment and lower the rope until your hands are placed next to your face.
Flex your hips slightly and allow the weight to hyperextend the lower back. This will be your starting position.
With the hips stationary, flex the waist as you contract the abs so that the elbows travel towards the middle of the thighs. Exhale as you perform this portion of the movement and hold the contraction for a second.
Slowly return to the starting position as you inhale. Tip: Make sure that you keep constant tension on the abs throughout the movement. Also, do not choose a weight so heavy that the lower back handles the brunt of the work.
Repeat for the recommended amount of repetitions.
strengthbeginner
Cable Judo Flip
Muscle
abdominals
Equipment
cable
Also works
Nothing else
How to do it
Connect a rope attachment to a tower, and move the cable to the lowest pulley position. Stand with your side to the cable with a wide stance, and grab the rope with both hands.
Twist your body away from the pulley as you bring the rope over your shoulder like you're performing a judo flip.
Shift your weight between your feet as you twist and crunch forward, pulling the cable downward.
Return to the starting position and repeat until failure.
Then, reposition and repeat the same series of movements on the opposite side.
strengthbeginner
Cable Reverse Crunch
Muscle
abdominals
Equipment
cable
Also works
Nothing else
How to do it
Connect an ankle strap attachment to a low pulley cable and position a mat on the floor in front of it.
Sit down with your feet toward the pulley and attach the cable to your ankles.
Lie down, elevate your legs and bend your knees at a 90-degree angle. Your legs and the cable should be aligned. If not, adjust the pulley up or down until they are.
With your hands behind your head, bring your knees inward to your torso and elevate your hips off the floor.
Pause for a moment and in a slow and controlled manner drop your hips and bring your legs back to the starting 90-degree angle. You should still have tension on your abs in the resting position.
Repeat the same movement to failure.
strengthbeginner
Cable Russian Twists
Muscle
abdominals
Equipment
cable
Also works
Nothing else
How to do it
Connect a standard handle attachment, and position the cable to a middle pulley position.
Lie on a stability ball perpendicular to the cable and grab the handle with one hand. You should be approximately arm's length away from the pulley, with the tension of the weight on the cable.
Grab the handle with both hands and fully extend your arms above your chest. You hands should be directly in-line with the pulley. If not, adjust the pulley up or down until they are.
Keep your hips elevated and abs engaged. Rotate your torso away from the pulley for a full-quarter rotation. Your body should be flat from head to knees.
Pause for a moment and in a slow and controlled manner reset to the starting position. You should still have side tension on the cable in the resting position.
Repeat the same movement to failure.
Then, reposition and repeat the same series of movements on the opposite side.
strengthbeginner
Cable Seated Crunch
Muscle
abdominals
Equipment
cable
Also works
Nothing else
How to do it
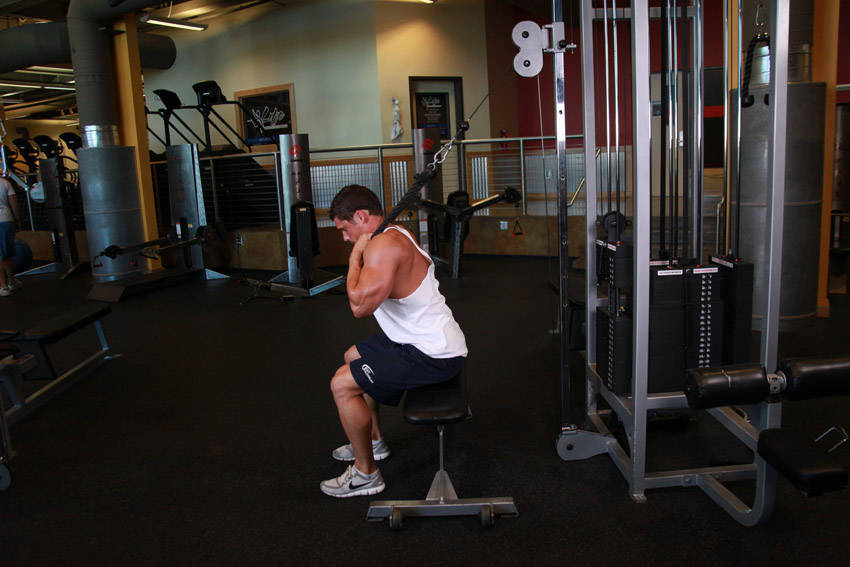
Seat on a flat bench with your back facing a high pulley.
Grasp the cable rope attachment with both hands (with the palms of the hands facing each other) and place your hands securely over both shoulders. Tip: Allow the weight to hyperextend the lower back slightly. This will be your starting position.
With the hips stationary, flex the waist so the elbows travel toward the hips. Breathe out as you perform this step.
As you inhale, go back to the initial position slowly.
Repeat for the recommended amount of repetitions.
strengthbeginner
Cocoons
Muscle
abdominals
Equipment
Bodyweight
Also works
Nothing else
How to do it
Begin by lying on your back on the ground. Your legs should be straight and your arms extended behind your head. This will be your starting position.
To perform the movement, tuck the knees toward your chest, rotating your pelvis to lift your glutes from the floor. As you do so, flex the spine, bringing your arms back over your head to perform a simultaneous crunch motion.
After a brief pause, return to the starting position.
strengthbeginner
Cross-Body Crunch
Muscle
abdominals
Equipment
Bodyweight
Also works
Nothing else
How to do it
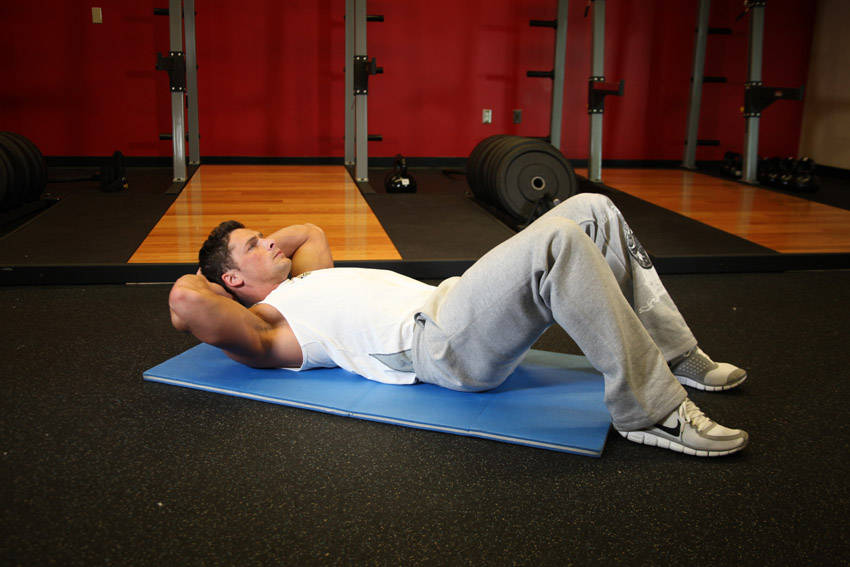
Lie flat on your back and bend your knees about 60 degrees.
Keep your feet flat on the floor and place your hands loosely behind your head. This will be your starting position.
Now curl up and bring your right elbow and shoulder across your body while bring your left knee in toward your left shoulder at the same time. Reach with your elbow and try to touch your knee. Exhale as you perform this movement. Tip: Try to bring your shoulder up towards your knee rather than just your elbow and remember that the key is to contract the abs as you perform the movement; not just to move the elbow.
Now go back down to the starting position as you inhale and repeat with the left elbow and the right knee.
Continue alternating in this manner until all prescribed repetitions are done.
strengthbeginner
Crunch - Hands Overhead
Muscle
abdominals
Equipment
Bodyweight
Also works
Nothing else
How to do it
Lie on the floor with your back flat and knees bent with around a 60-degree angle between the hamstrings and the calves.
Keep your feet flat on the floor and stretch your arms overhead with your palms crossed. This will be your starting position.
Curl your upper body forward and bring your shoulder blades just off the floor. At all times, keep your arms aligned with your head, neck and shoulder. Don't move them forward from that position. Exhale as you perform this portion of the movement and hold the contraction for a second.
Slowly lower down to the starting position as you inhale.
Repeat for the recommended amount of repetitions.
strengthbeginner
Crunch - Legs On Exercise Ball
Muscle
abdominals
Equipment
Bodyweight
Also works
Nothing else
How to do it
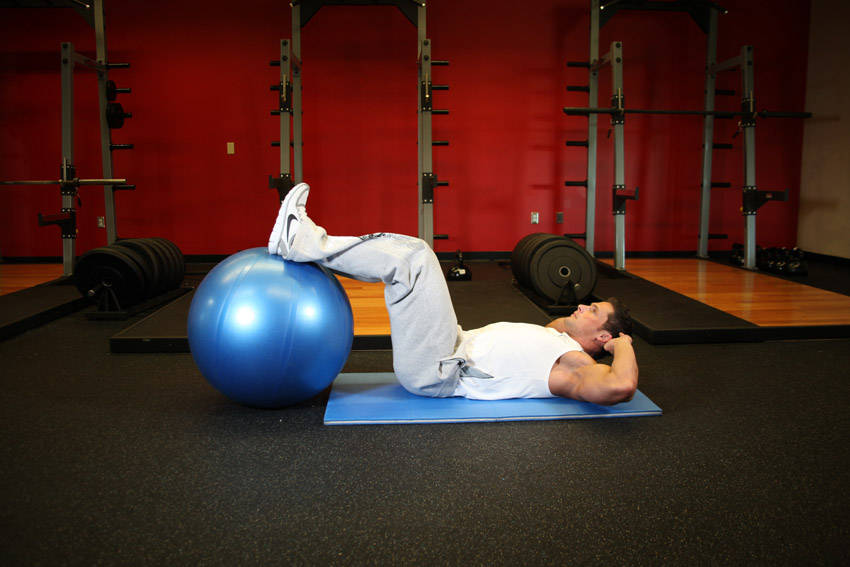
Lie flat on your back with your feet resting on an exercise ball and your knees bent at a 90 degree angle.
Place your feet three to four inches apart and point your toes inward so they touch.
Place your hands lightly on either side of your head keeping your elbows in. Tip: Don't lock your fingers behind your head.
Push the small of your back down in the floor in order to better isolate your abdominal muscles. This will be your starting position.
Begin to roll your shoulders off the floor and continue to push down as hard as you can with your lower back. Your shoulders should come up off the floor only about four inches, and your lower back should remain on the floor. Breathe out as you execute this portion of the movement. Squeeze your abdominals hard at the top of the contraction and hold for a second. Tip: Focus on a slow, controlled movement. Refrain from using momentum at any time.
Slowly go back down to the starting position as you inhale.
Repeat for the recommended amount of repetitions.
Exercise data from the Free Exercise DB (public domain).